
Scheduling Poll a.k.a. Find Time
| Important: As of December 11th, 2023, the FindTime add-in will be replaced with Scheduling Poll as a native feature in Outlook. See more details here. |
Announcing FindTime as a native feature in Outlook with the new name, Scheduling Poll!
We are excited to introduce Scheduling poll, bringing the capabilities of FindTime as a native feature in Outlook. Scheduling poll is currently available to all users of Outlook on the Web and Mac.
What do I need to do to transition from FindTime to Scheduling Poll?
A. Nothing! When Scheduling poll is rolled out to your tenant, the entry point to the FindTime Add-in will be hidden and you should see a button to open the Scheduling poll pane in the Outlook compose ribbon instead (more details here). We have made UX updates to help improve the experience. The functionality should remain the same and you should be able to create new polls just like before.
What happens to my existing polls?
A. All the polls you created through the FindTime add-in should remain active and actionable through the voting page and the polls dashboard even if the add-in is deprecated and replaced by the Scheduling poll UI. The only thing that has changed is the way you create a poll.
What’s the same
As we bring Scheduling poll directly to Outlook, users can expect to have a similar set of features and workflow as the existing FindTime add-in.
What’s different
Scheduling poll uses the same modern design and framework we use in the updated Outlook on the web and the new Outlook for Windows, making it easier to maintain and enhance for the future.
Important: What is happening to the FindTime add-in?
The FindTime add-in will stop working and be removed from Outlook for Windows, Web and Mac. Scheduling Poll is the replacement feature, which is built directly into Outlook clients for all users as a native feature.
When this will happen:
You can expect the FindTime add-in to stop working as early as December 11, 2023. We will start making the change on December 11, 2023, and expect to complete it by the end of that week.
Scheduling Poll articles from Microsoft
Create a poll using Scheduling Poll
Scheduling Poll organizer dashboard
Privacy and personal data protection
Auto scheduling in Scheduling Poll
Include an online meeting with Scheduling Poll
OLD INFORMATION, WILL BE REMOVED 3/1/2024
FindTime is an Outlook add-in that makes scheduling easier and more efficient by allowing the host (scheduler) to propose multiple times/dates to invitation recipients through a meeting poll which they vote on.
FindTime works on Office 365 Outlook for the Web, Outlook 2016, and Outlook for Mac 2016. Only the meeting scheduler needs to have an Office 365 account, Outlook and FindTime, invitees/attendees do not.
For more details see What is FindTime, who is it meant for and what are the requirements?.
Get Started
- Go to the FindTime website and click the blue Install for free button located in upper-part of page.
- Restart Outlook (or refresh browser page) after installing the add-in.
This is an outline of steps to create a meeting poll.
![]() See How scheduling works in the FindTime Knowledge Base for complete details on creating meeting polls with FindTime.
See How scheduling works in the FindTime Knowledge Base for complete details on creating meeting polls with FindTime.
Note: Installation of FindTime is NOT required for recipients to vote on meeting times, it is only required to schedule them.
- Open Outlook and create a new email message ( not a new meeting or appointment).
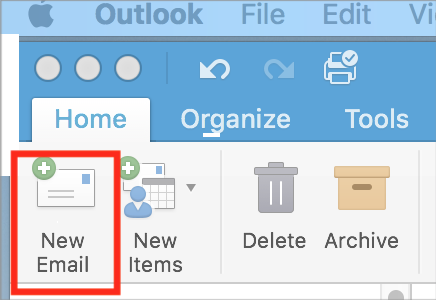
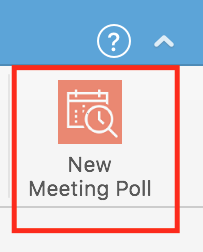
- Enter addresses of required recipients in the TO field of email, then click the red New Meeting Poll icon located on the far right of ribbon ( make sure the Message tab is open). Place optional attendees CC field.
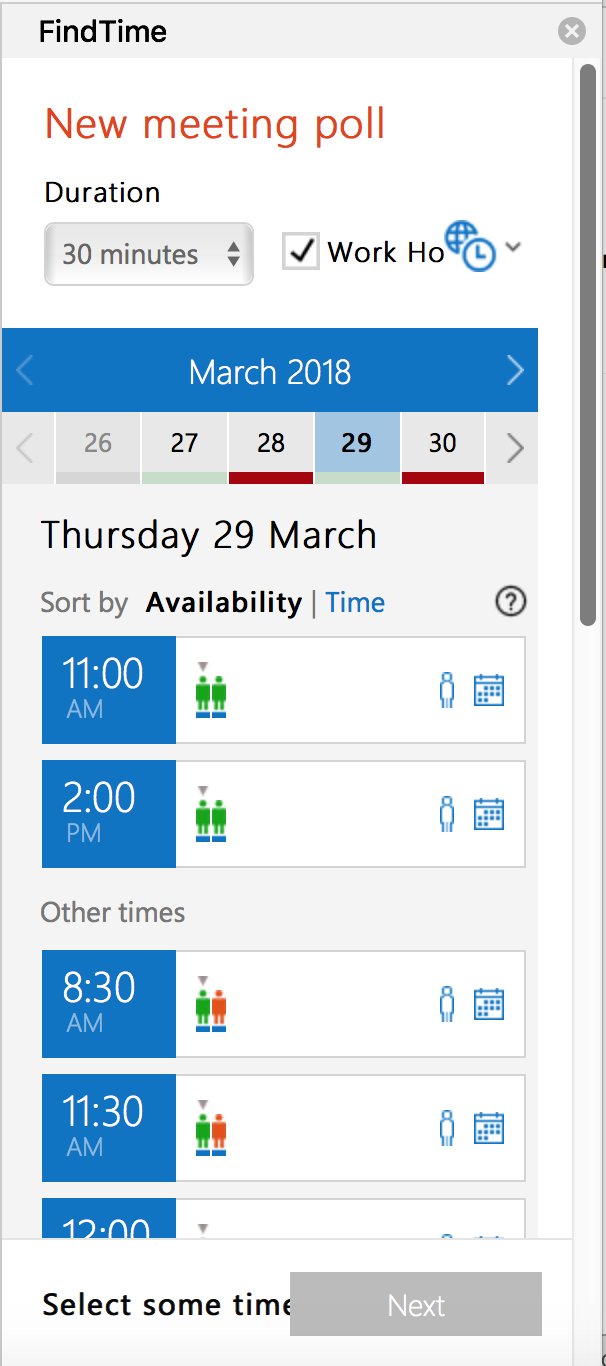
- The New meeting poll panel opens. This is where you make your meeting selections: (see image below )
- Duration of meeting
- Work hours - (or uncheck to show all hours/days)
- Timezone
- Times/Dates options for meeting
- (see FindTime Meeting settings for more details on these settings)
- Choose a date by clicking a day under the Month, use arrows to navigate to a different month or day.
- Click on each time from the selected day to add to the poll. (Click time again to deselect.)
- To provide options from another day, go back up to the Month section, select the new day (or month/day) and repeat process of adding times to the poll.
- Click Next after you've made all of your date selections.
- In the panel that opens: enter a Location or leave blank by deleting the pre-filled Online.
- Review selections and if changes are needed, click Back button to correct: if everything looks good click Insert into Email button.
Changes cannot be made to poll after this is done so be sure to review your choices.
The FindTime meeting poll panel is placed into your email. You can still make changes to meeting message text but not to the poll itself. - Click Send on email message to mail poll.
You will receive a direct link to the voting page for your meeting after you send the poll and you can also sign into FindTime to view it. - Recipients vote on proposed meeting times.
 See Using the FindTime voting page for details on viewing and understanding the page and results.
 - Scheduler is notified that voting is complete and meeting is automatically scheduled. The auto-schedule feature is enabled by default but can be turned off.
IMPORTANT: Notifications about your meeting's status will come from:
FindTime Notifications <[email protected]>.
When you are invited to a meeting scheduled with FindTime you will receive an email that contains the invitation message and a link to "Select options".
Clicking the link will take you to the FindTime web page and the poll for the meeting which you've been invited. You do not need to have FindTime add-in installed in your Outlook in order to make selections.
![]() See How to vote for complete details.
See How to vote for complete details.
Knowledge Base/FAQ
For a complete list of answers to questions about using FindTime, see FindTime Knowledge Base
Articles/FAQs include:
- Using the FindTime add-in
- How scheduling works
- Using the FindTime voting page
- FindTime organizer dashboard and settings
- About settings: Notifications, Holds, Auto Schedule
About reserving rooms in an invitation:
If you would like to reserve a conference room, add it to the TO field along with recipients. The room will not be polled, but this will allow you to see when the room is available so that you can be sure to select and propose dates when it is free. Once the vote is finished and you schedule the meeting the room will be scheduled as it is done in non-polled invitations.