
Webex Education Connector
WebEx Education Connector is a Learning Tool Integration (LTI) available inside of Brightspace. The LTI enables Virtual Meetings and Office Hours using Webex from within the Brightspace platform.
Setting up the Webex Education Connector in a Course
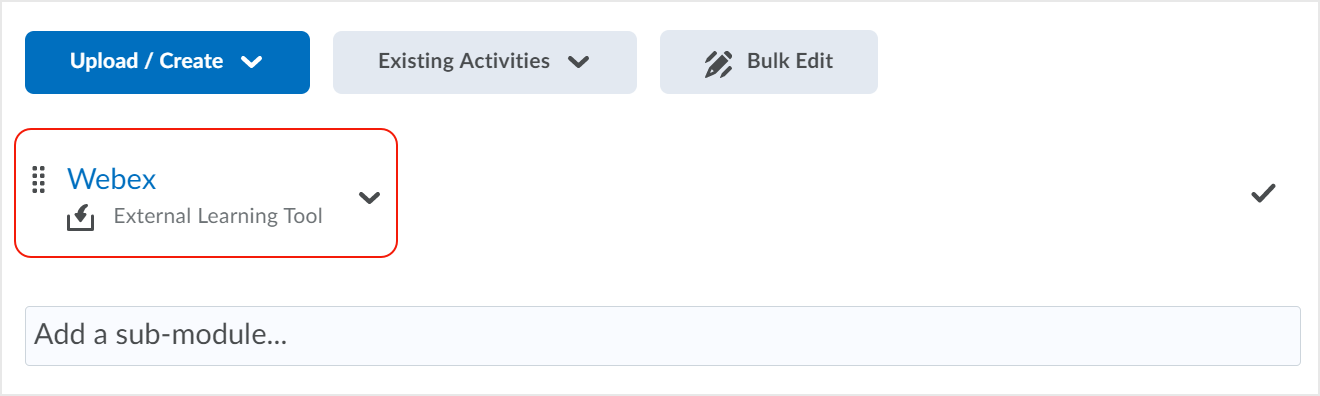
Create the Webex External tool in a course content area module.
- Go to the Content area of a course, add a new content module
- OR open a module in which the Webex link will be placed
- Select “Existing Activities” > “External Learning Tools”
- Select “Webex” from the LTI Link list
- Click the Webex link and select “Sign in with Webex Meetings”
- Enter your NetID and Password and then click “Accept” when prompted
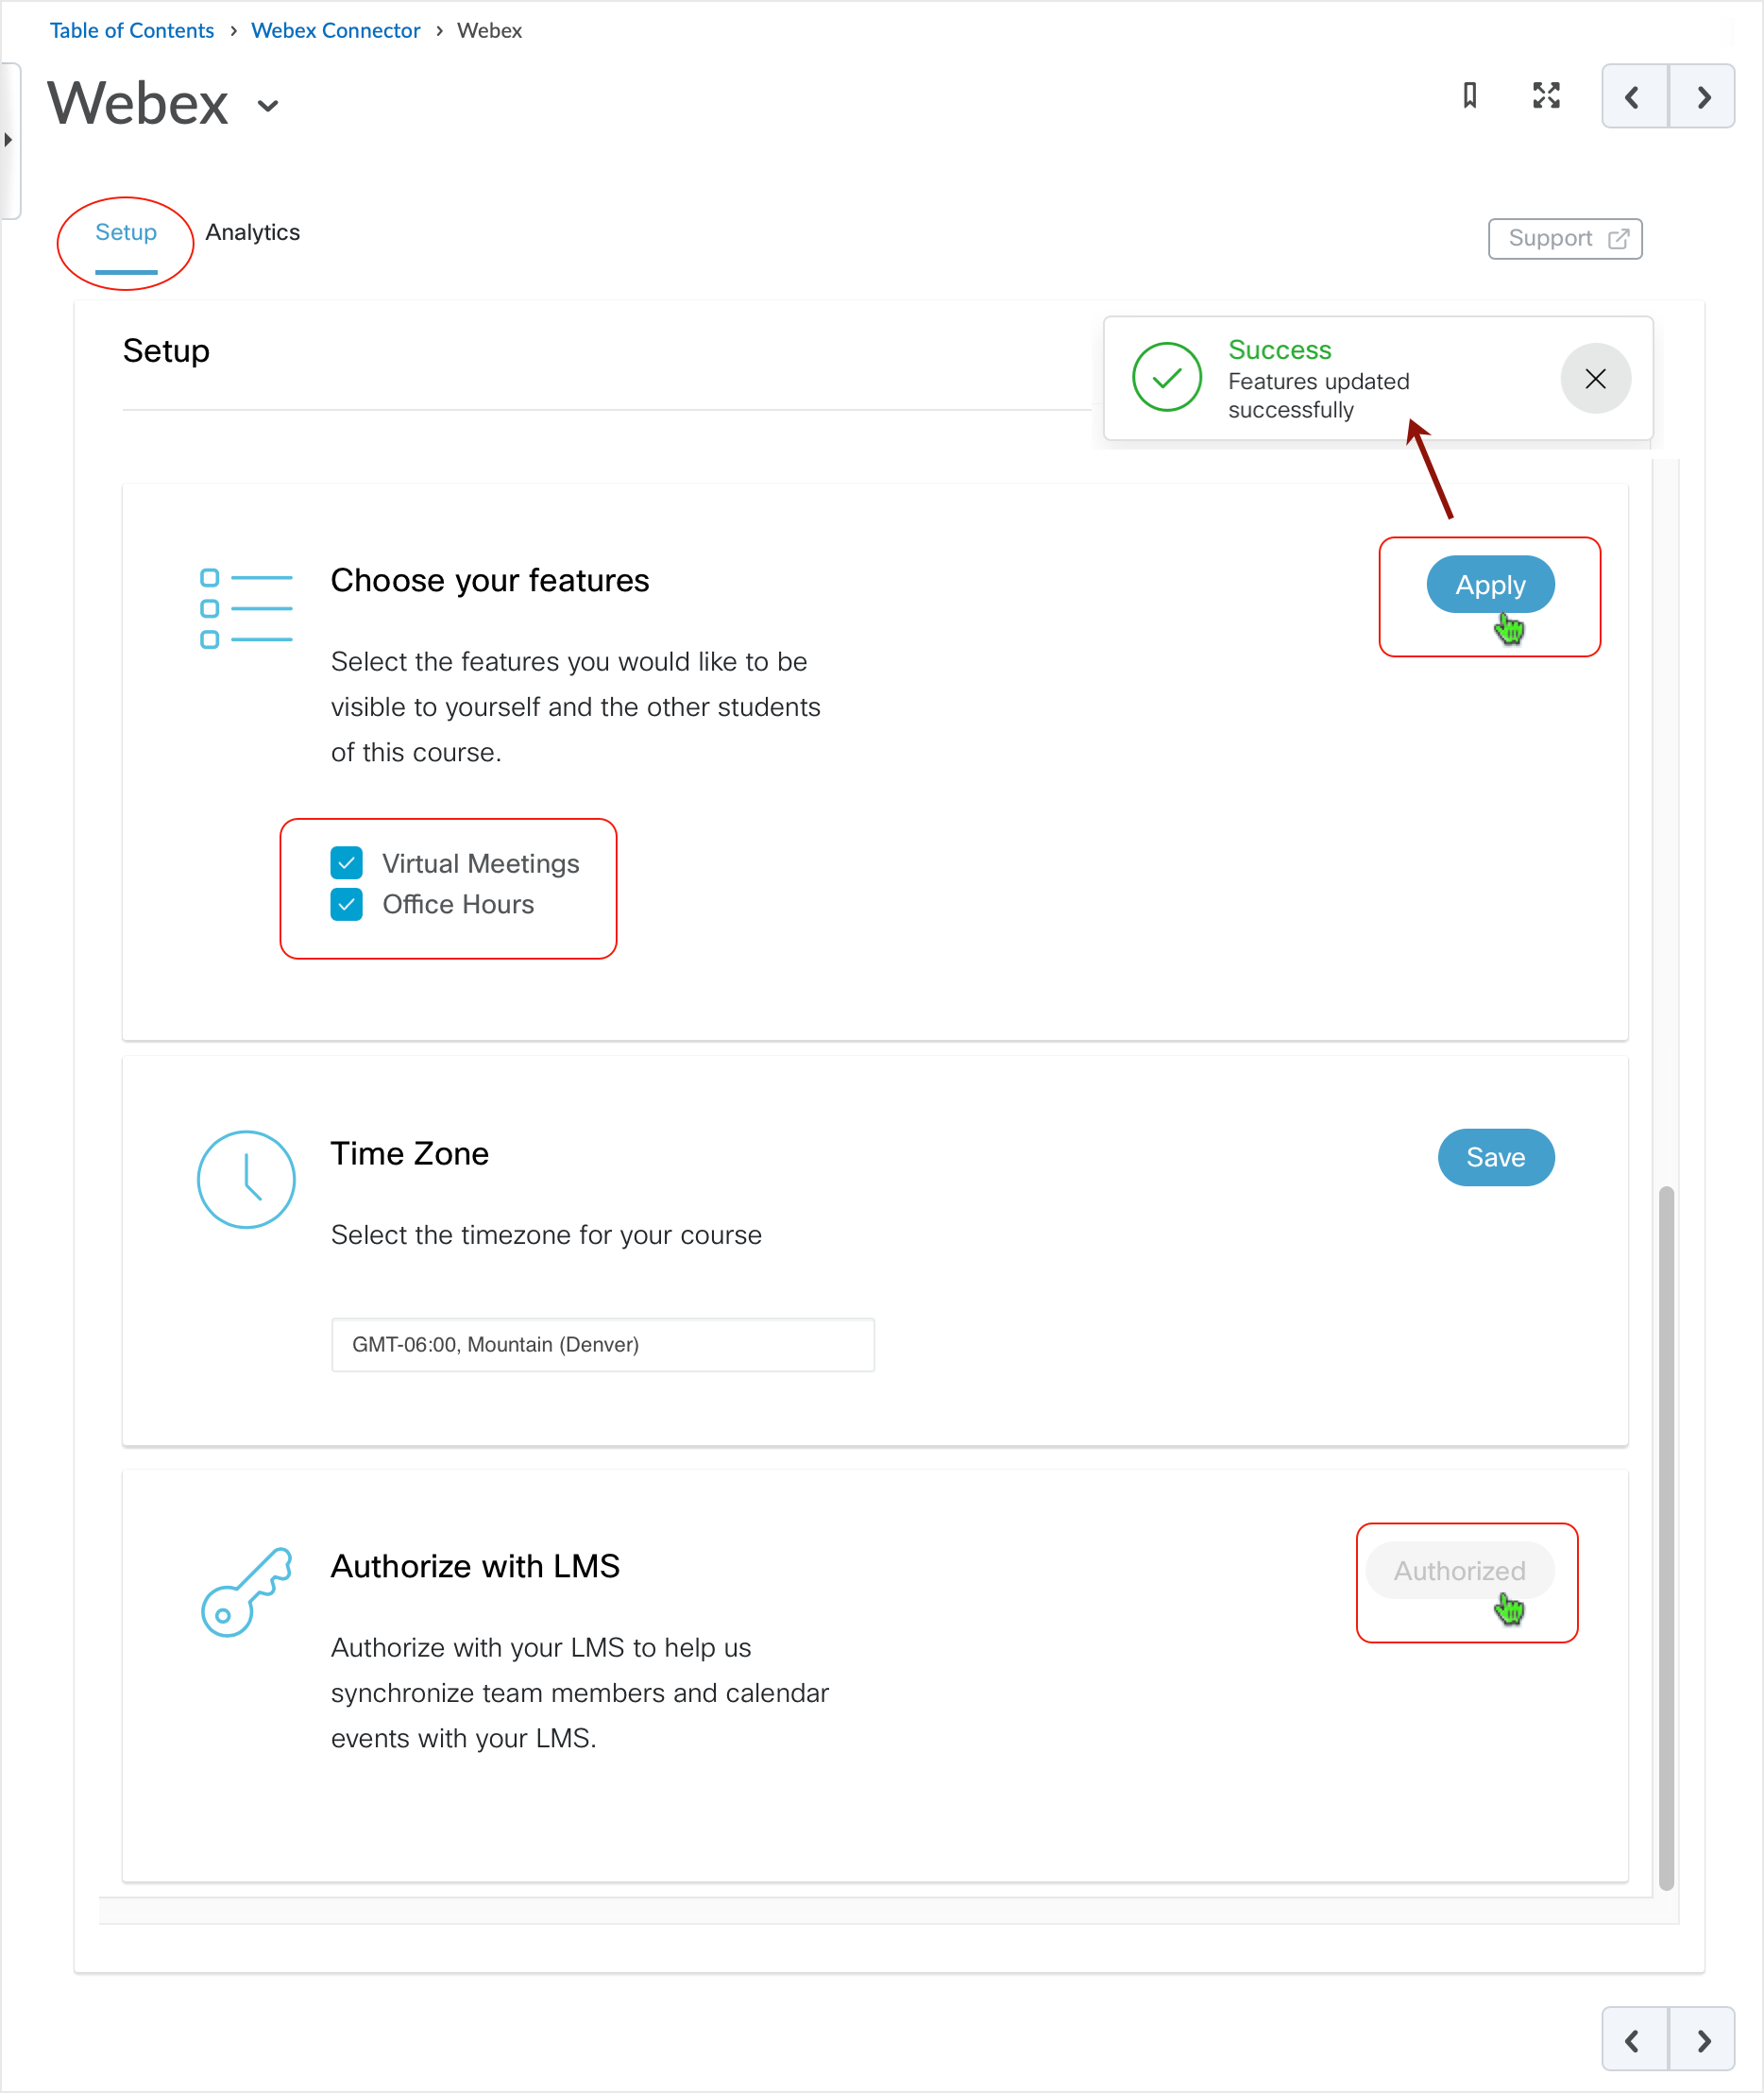
Return to the Webex External tool Education Connector in the content area.
- Click the “Setup” tab at the top of the content area.
- Under “Choose your features” select checkbox(es) next to Virtual Meetings and/or Office
Hours.
- Virtual Meetings: Schedule a recurring or one-time meeting with others in your course
- Office Hours: Select times where your students can schedule to meet with you through Webex
- After selecting the option(s), select "Apply" button.
- a "Success - Features updated successfully" alert will pop
- Select "Authorize with LMS" if this has not already taken place.
- in the graphic below, the authorization has already occurred
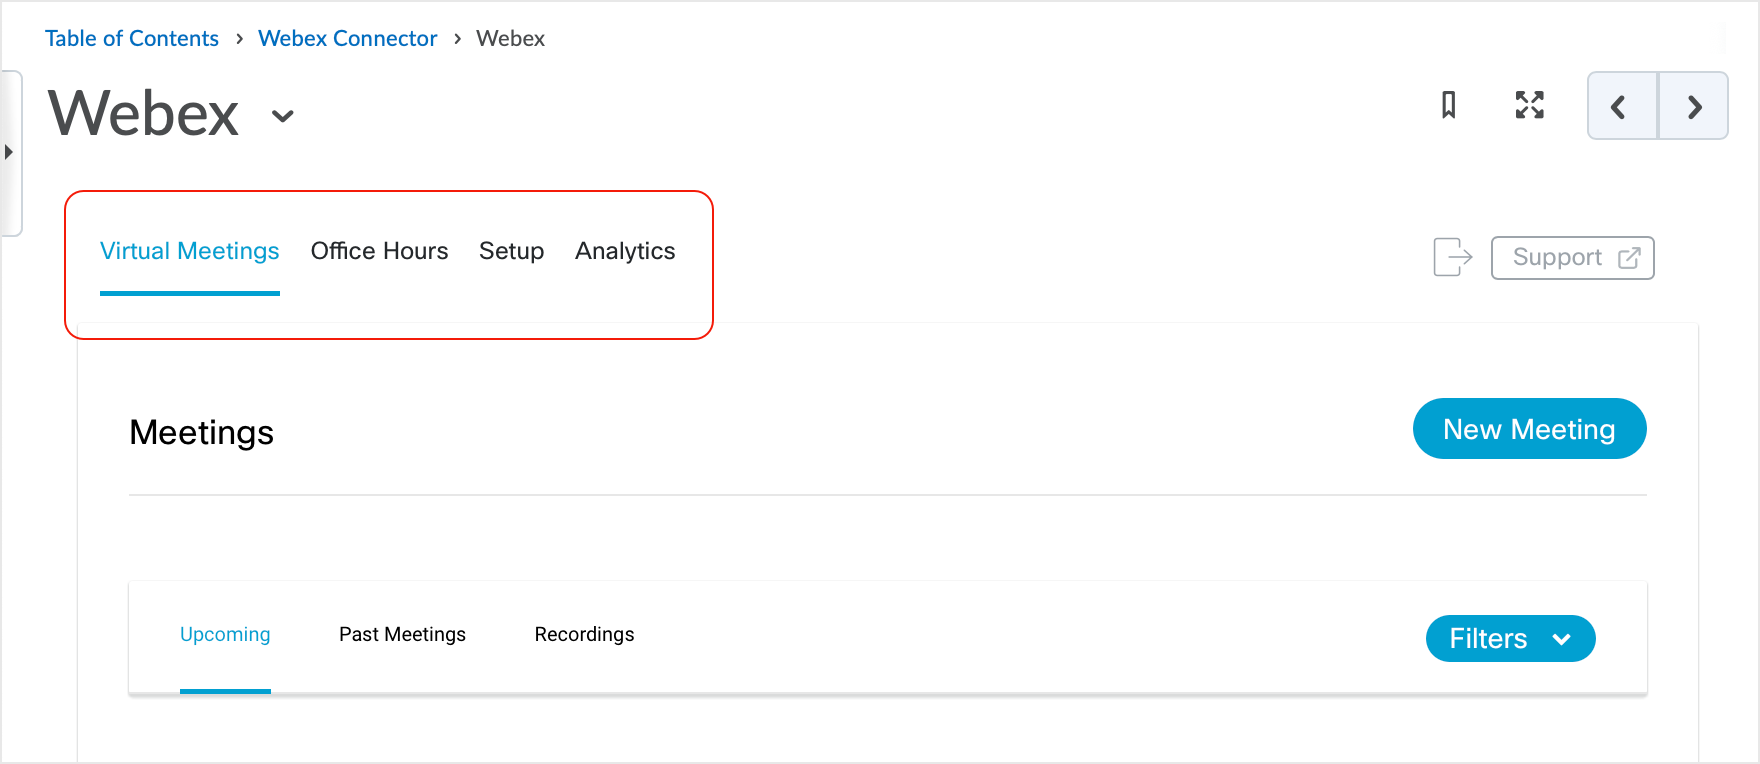
After "Virtual Meetings" and/or "Office Hours" have been enabled, selecting the Webex link reveals the available options.
- In this example, Virtual Meetings, Office Hours, Setup, and Analytics titles display.
- selecting a title makes it active and is identified by virtue of the title appearing with blue letters with a blue bar underline
Schedule a Virtual Meeting
Schedule Virtual Meetings to meet with others via Webex.
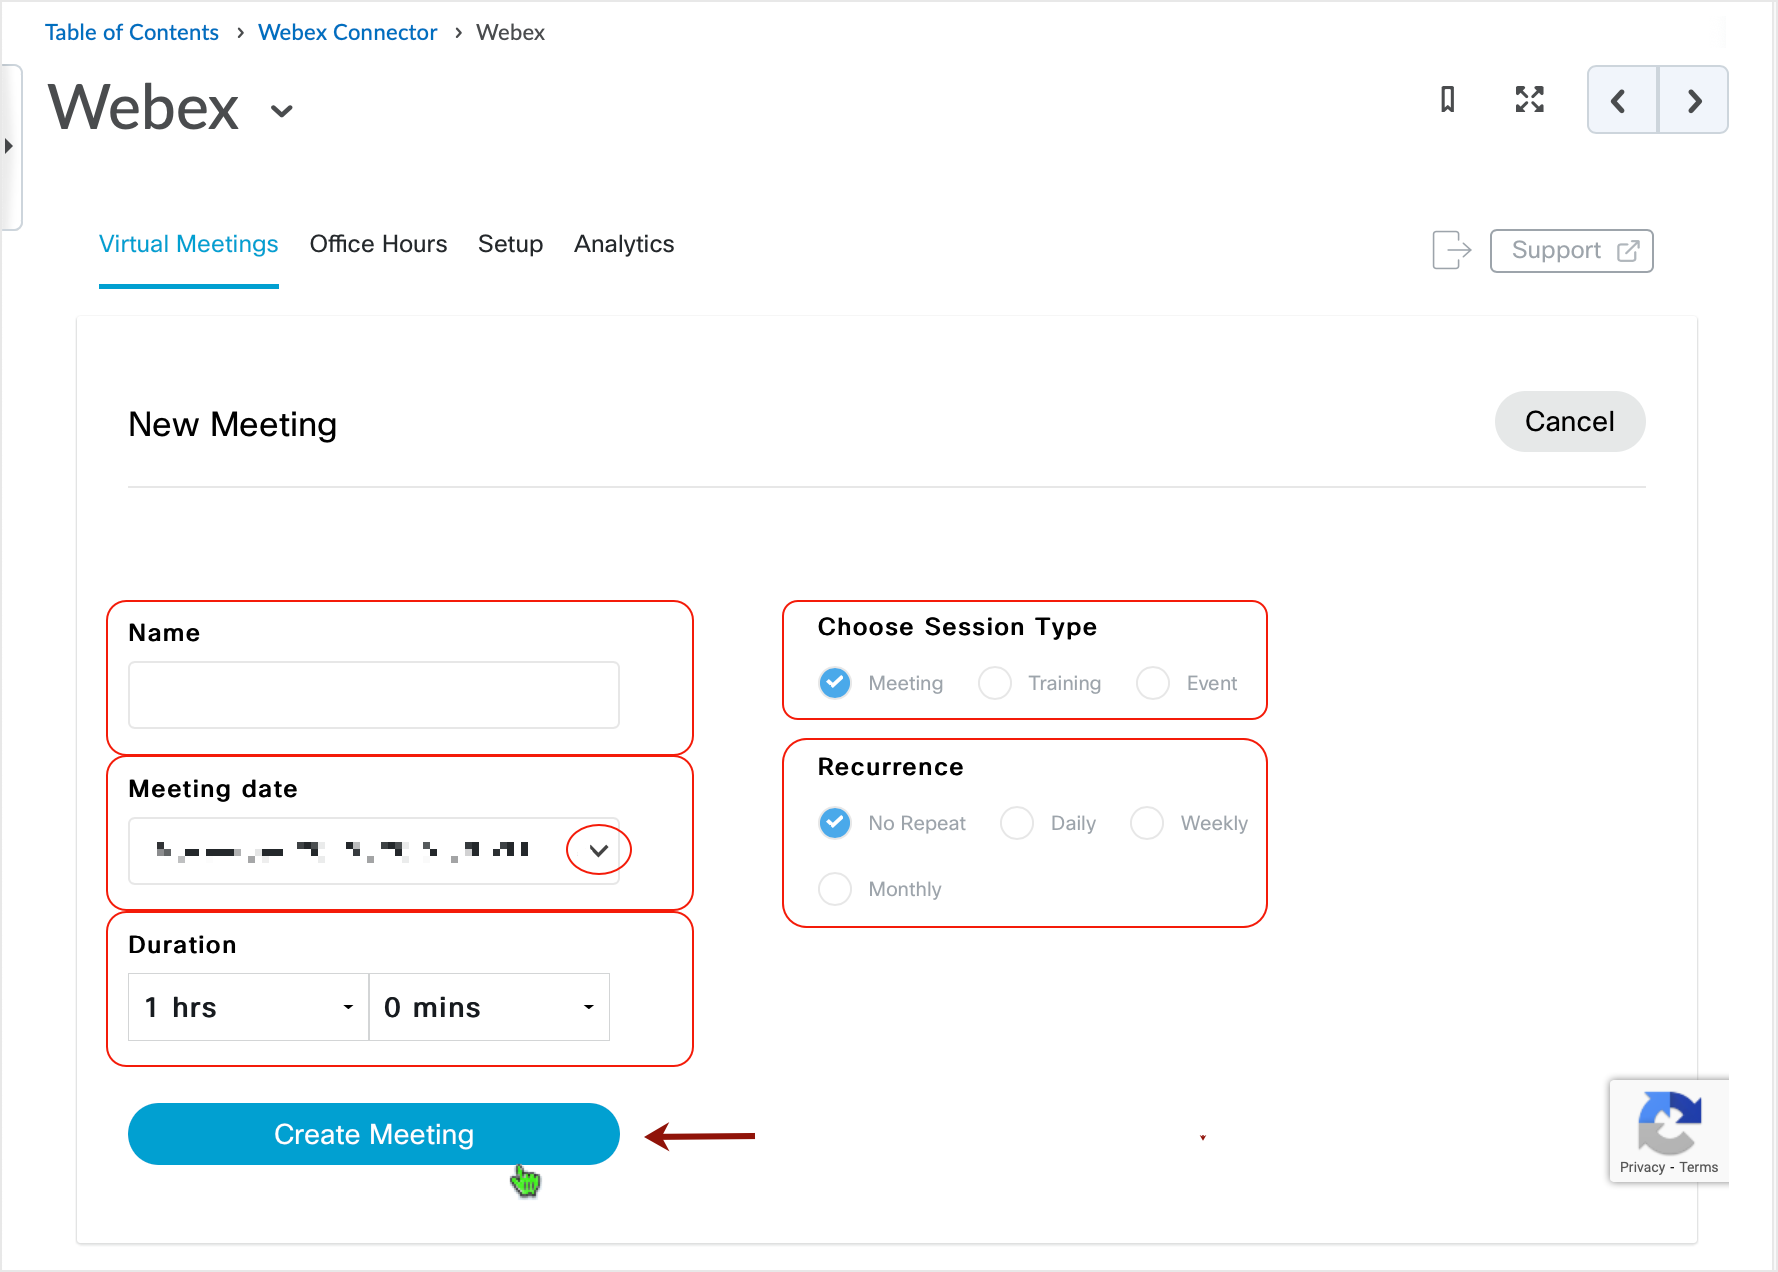
Click the Webex link in your content area to access the education connector and under the “Virtual Meetings” tab, select the “New Meeting” button.
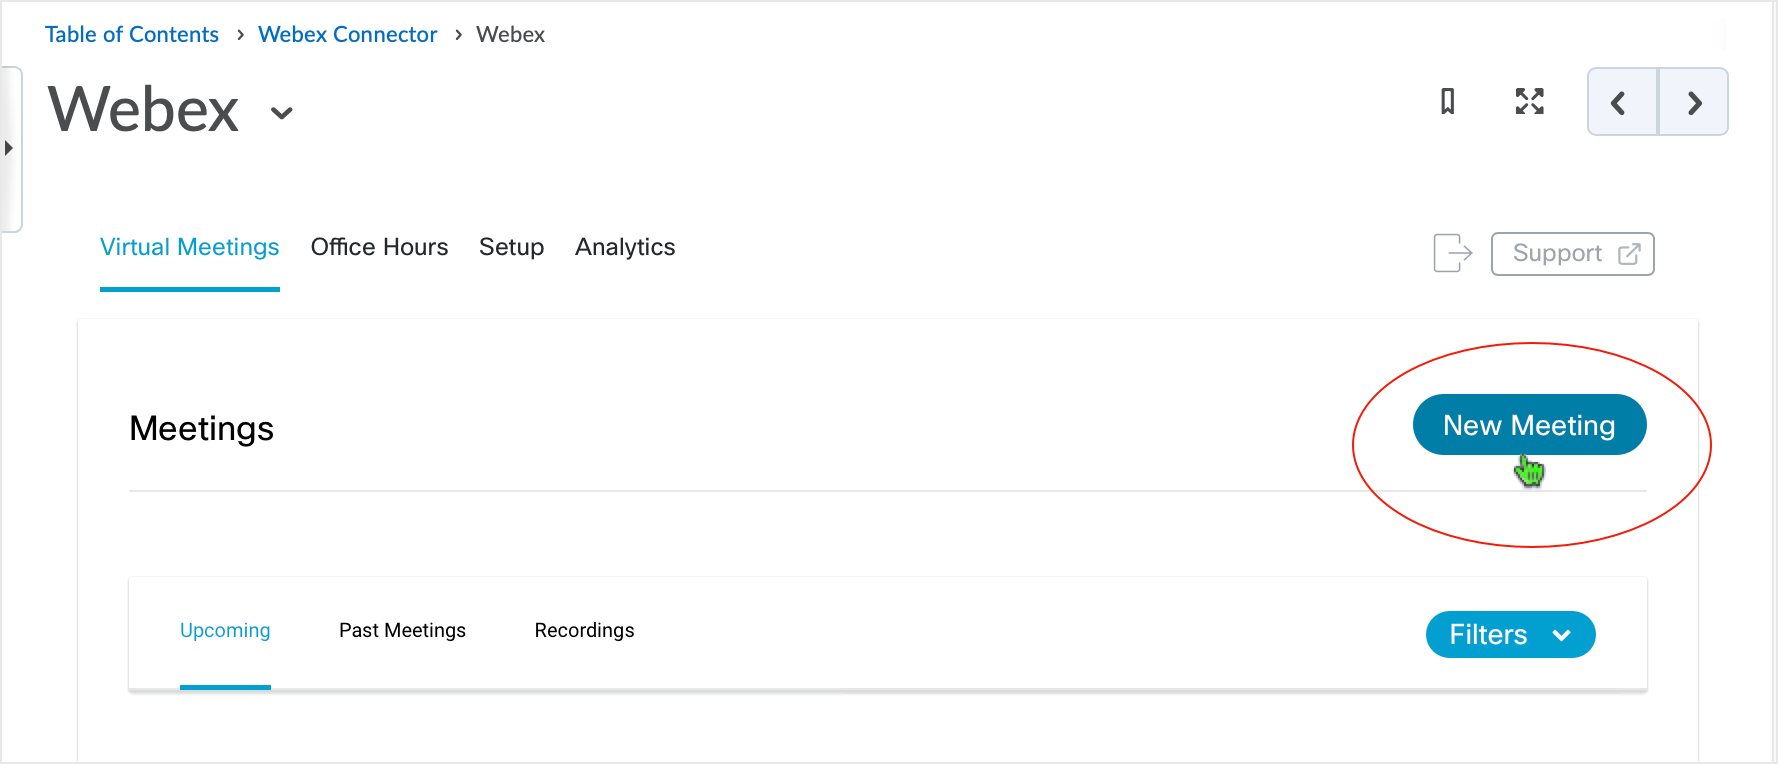
Give the meeting a name, select a session type (Meeting, Training or Event), and select a meeting date, duration and recurrence.
Once your details are set-up, select the “Create Meeting” button.
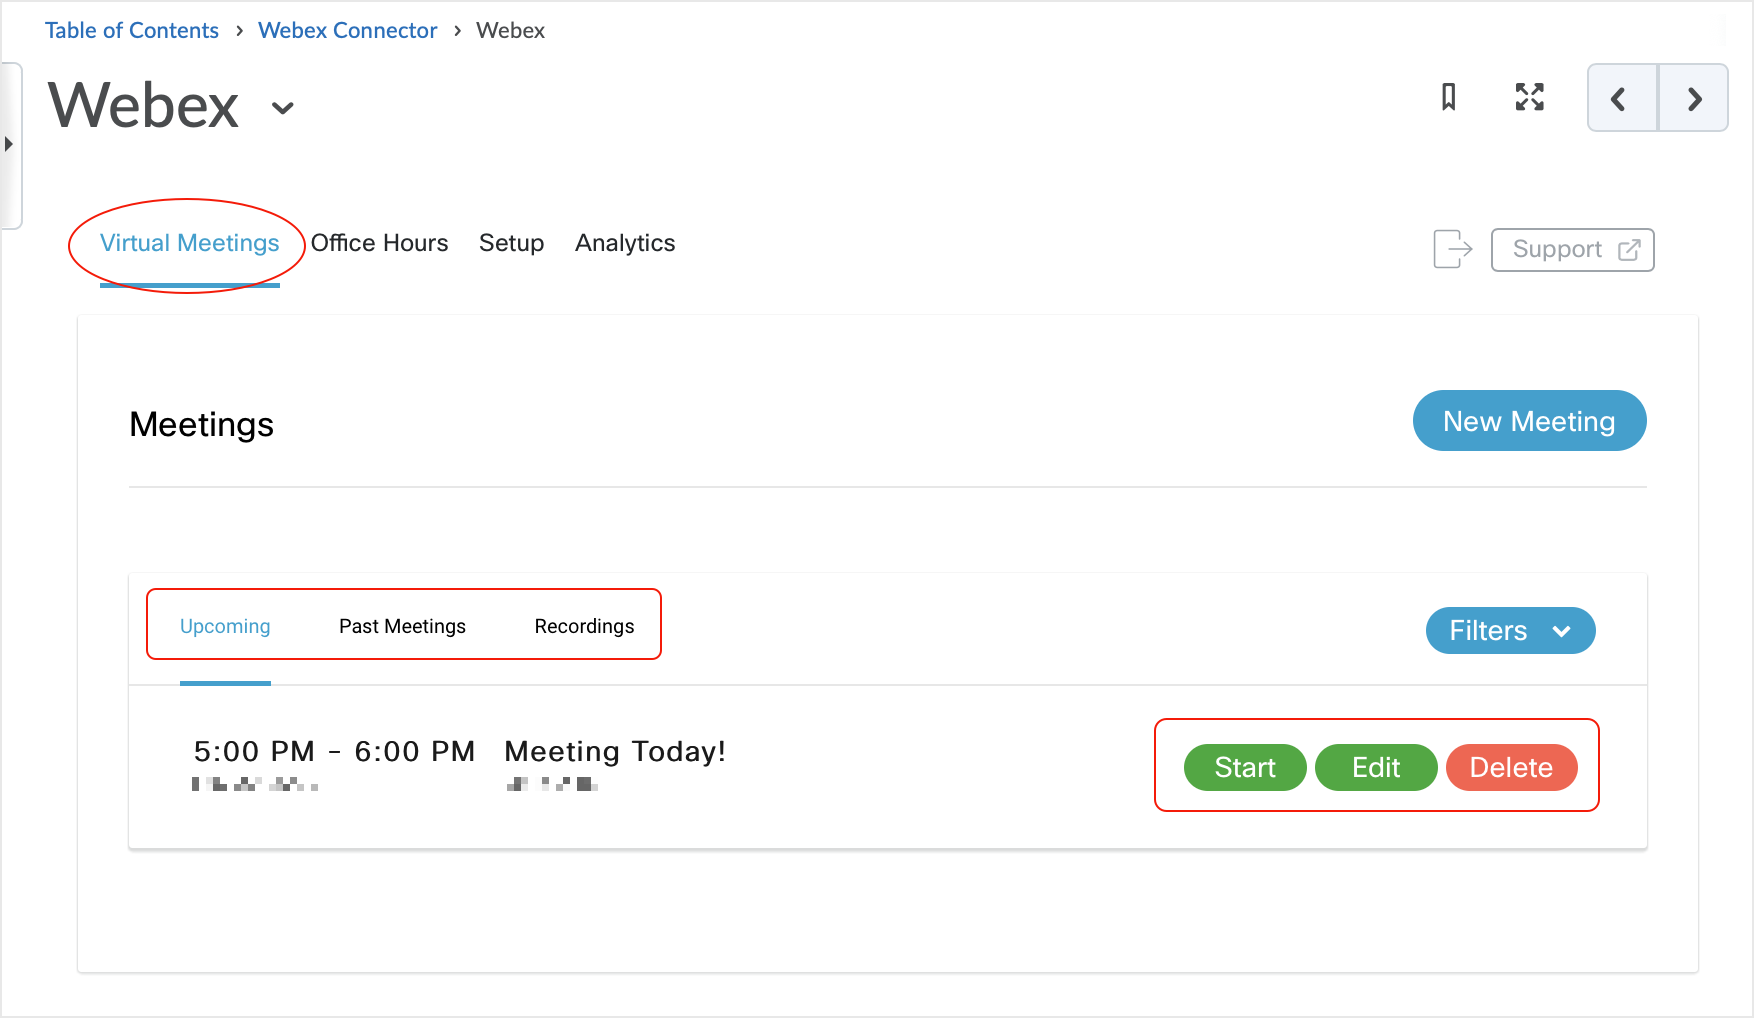
After a meeting is created, it will show up in the "Upcoming" tab. Users can view, start, edit, or delete their own created meeting as necessary.
"Past Meetings" and "Recordings" tabs are also available for use.
After you have hosted a meeting, it will show up under the “Past Meetings” tab. If you select the icon under “Action” in past meetings, it will allow you to see who participated in the call.
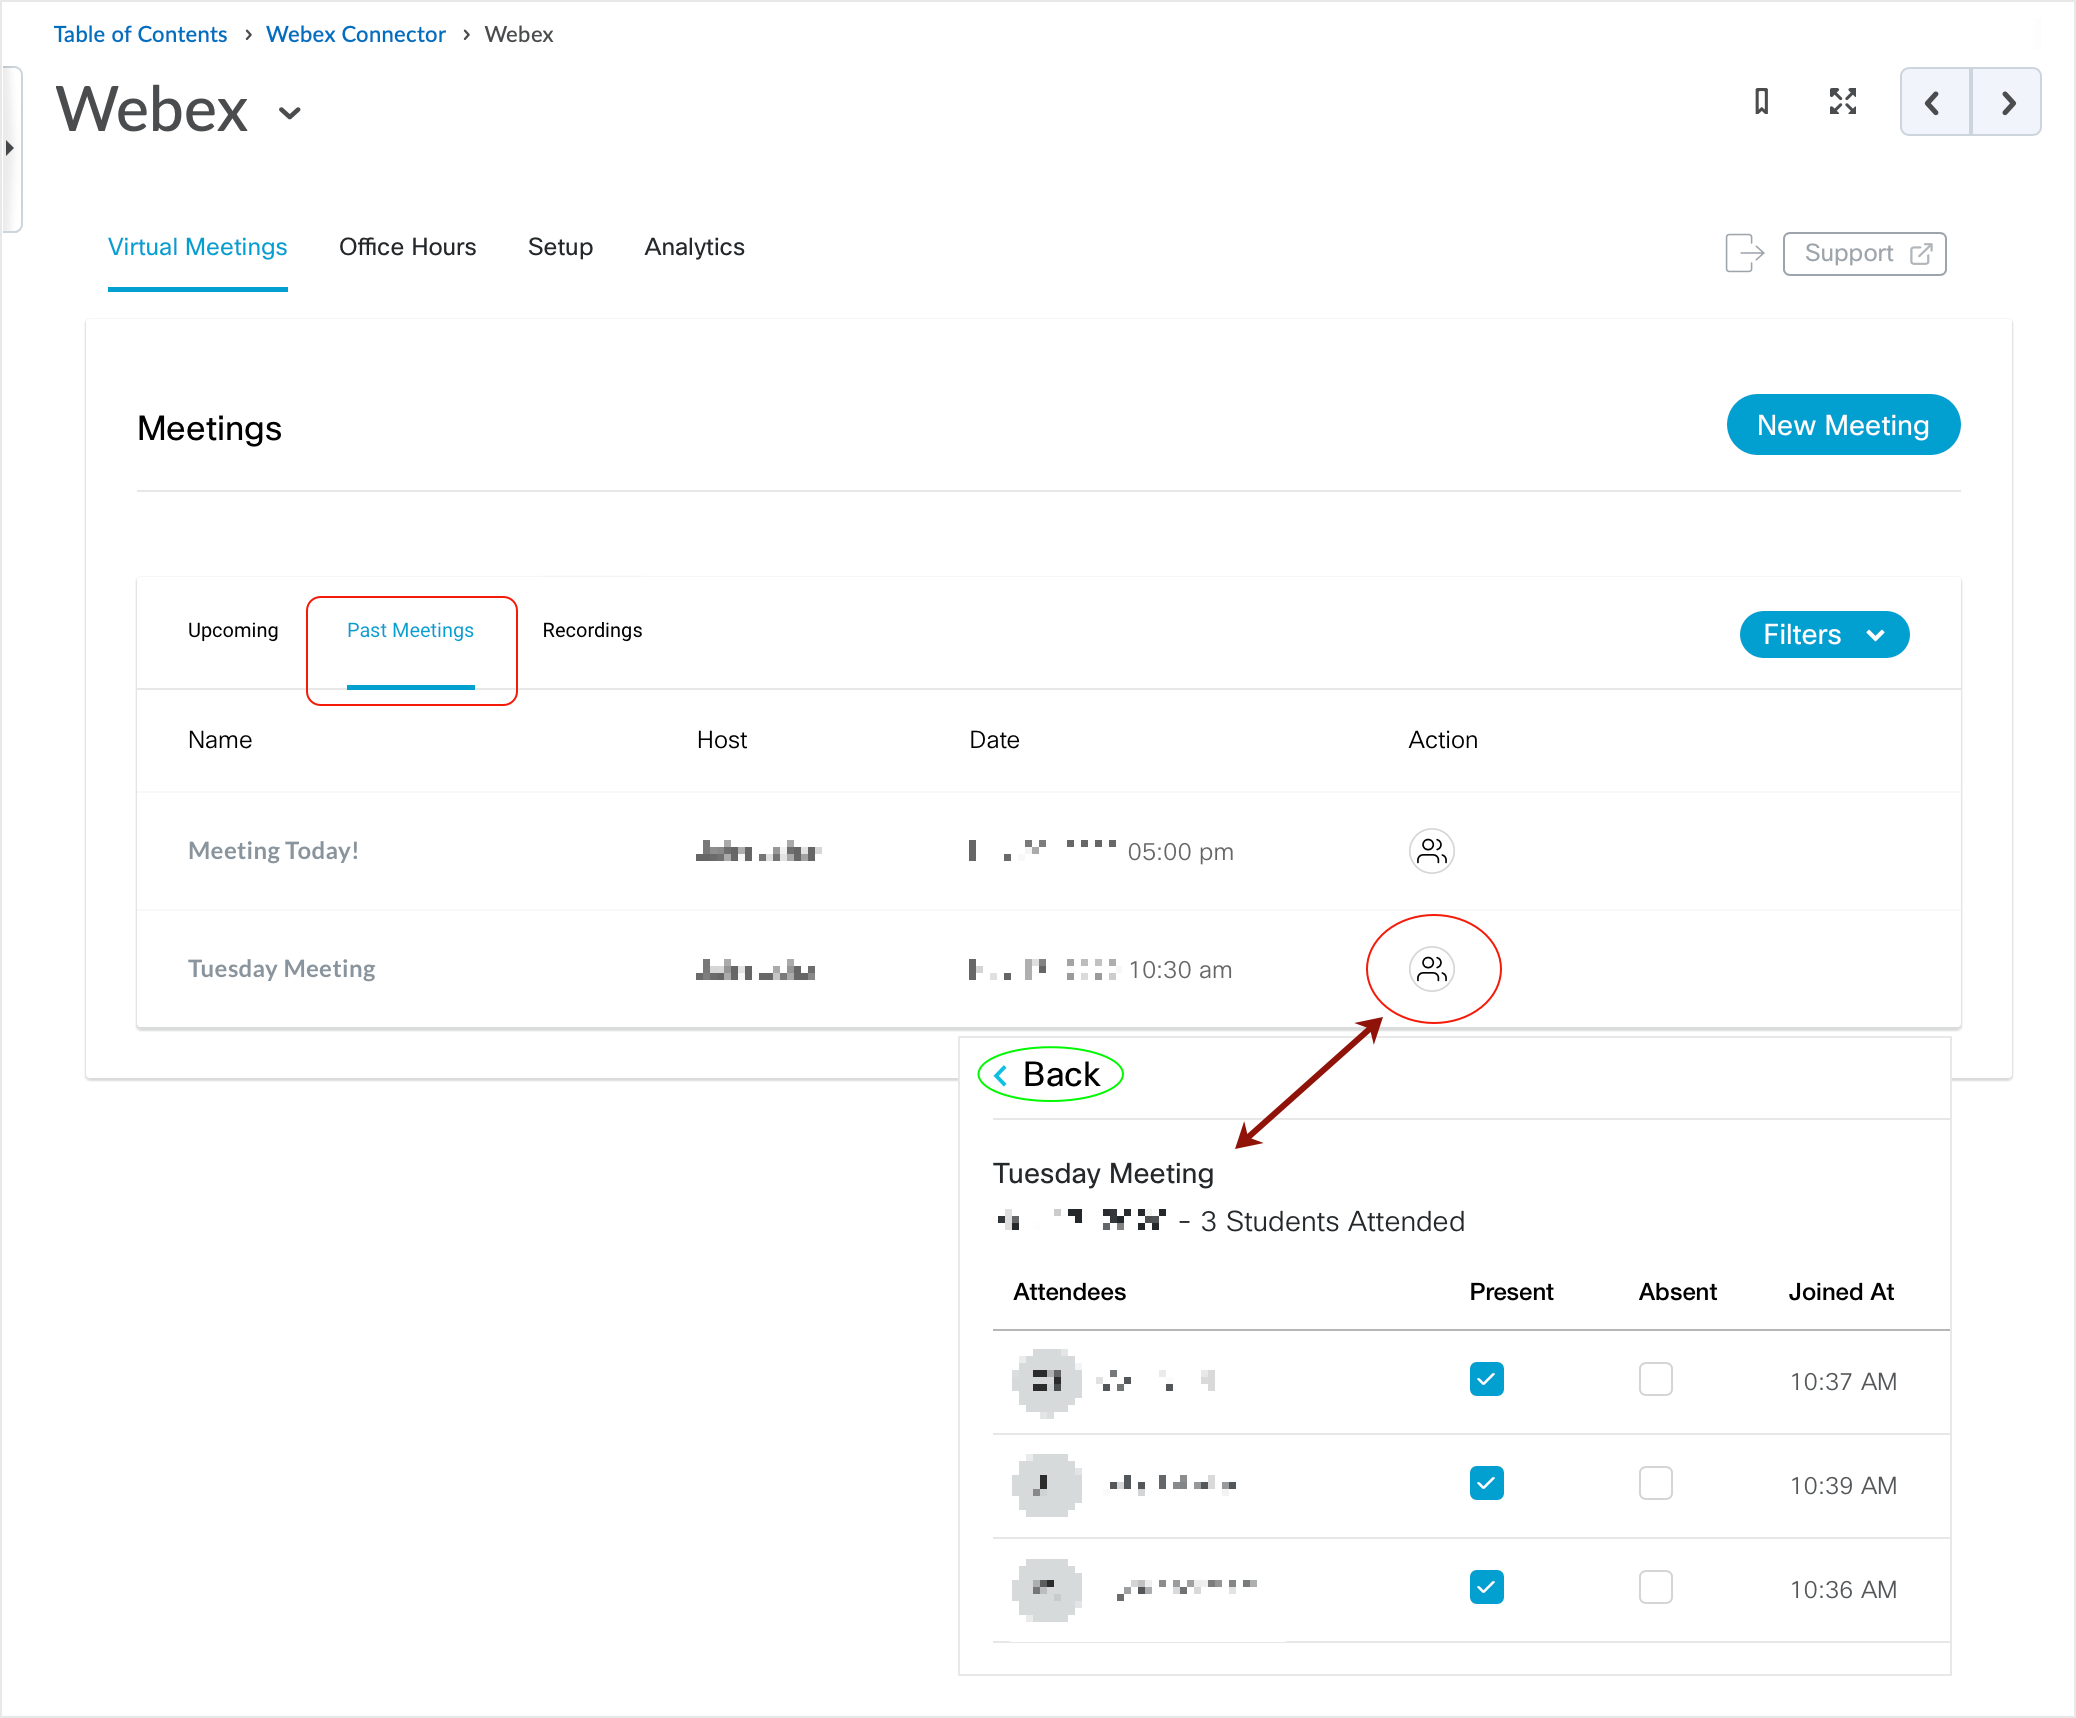
Recorded meetings can be viewed under the “Recordings” tab by both instructors and students.
Schedule Office Hours
Schedule Office Hours for interaction online via Webex with learners.
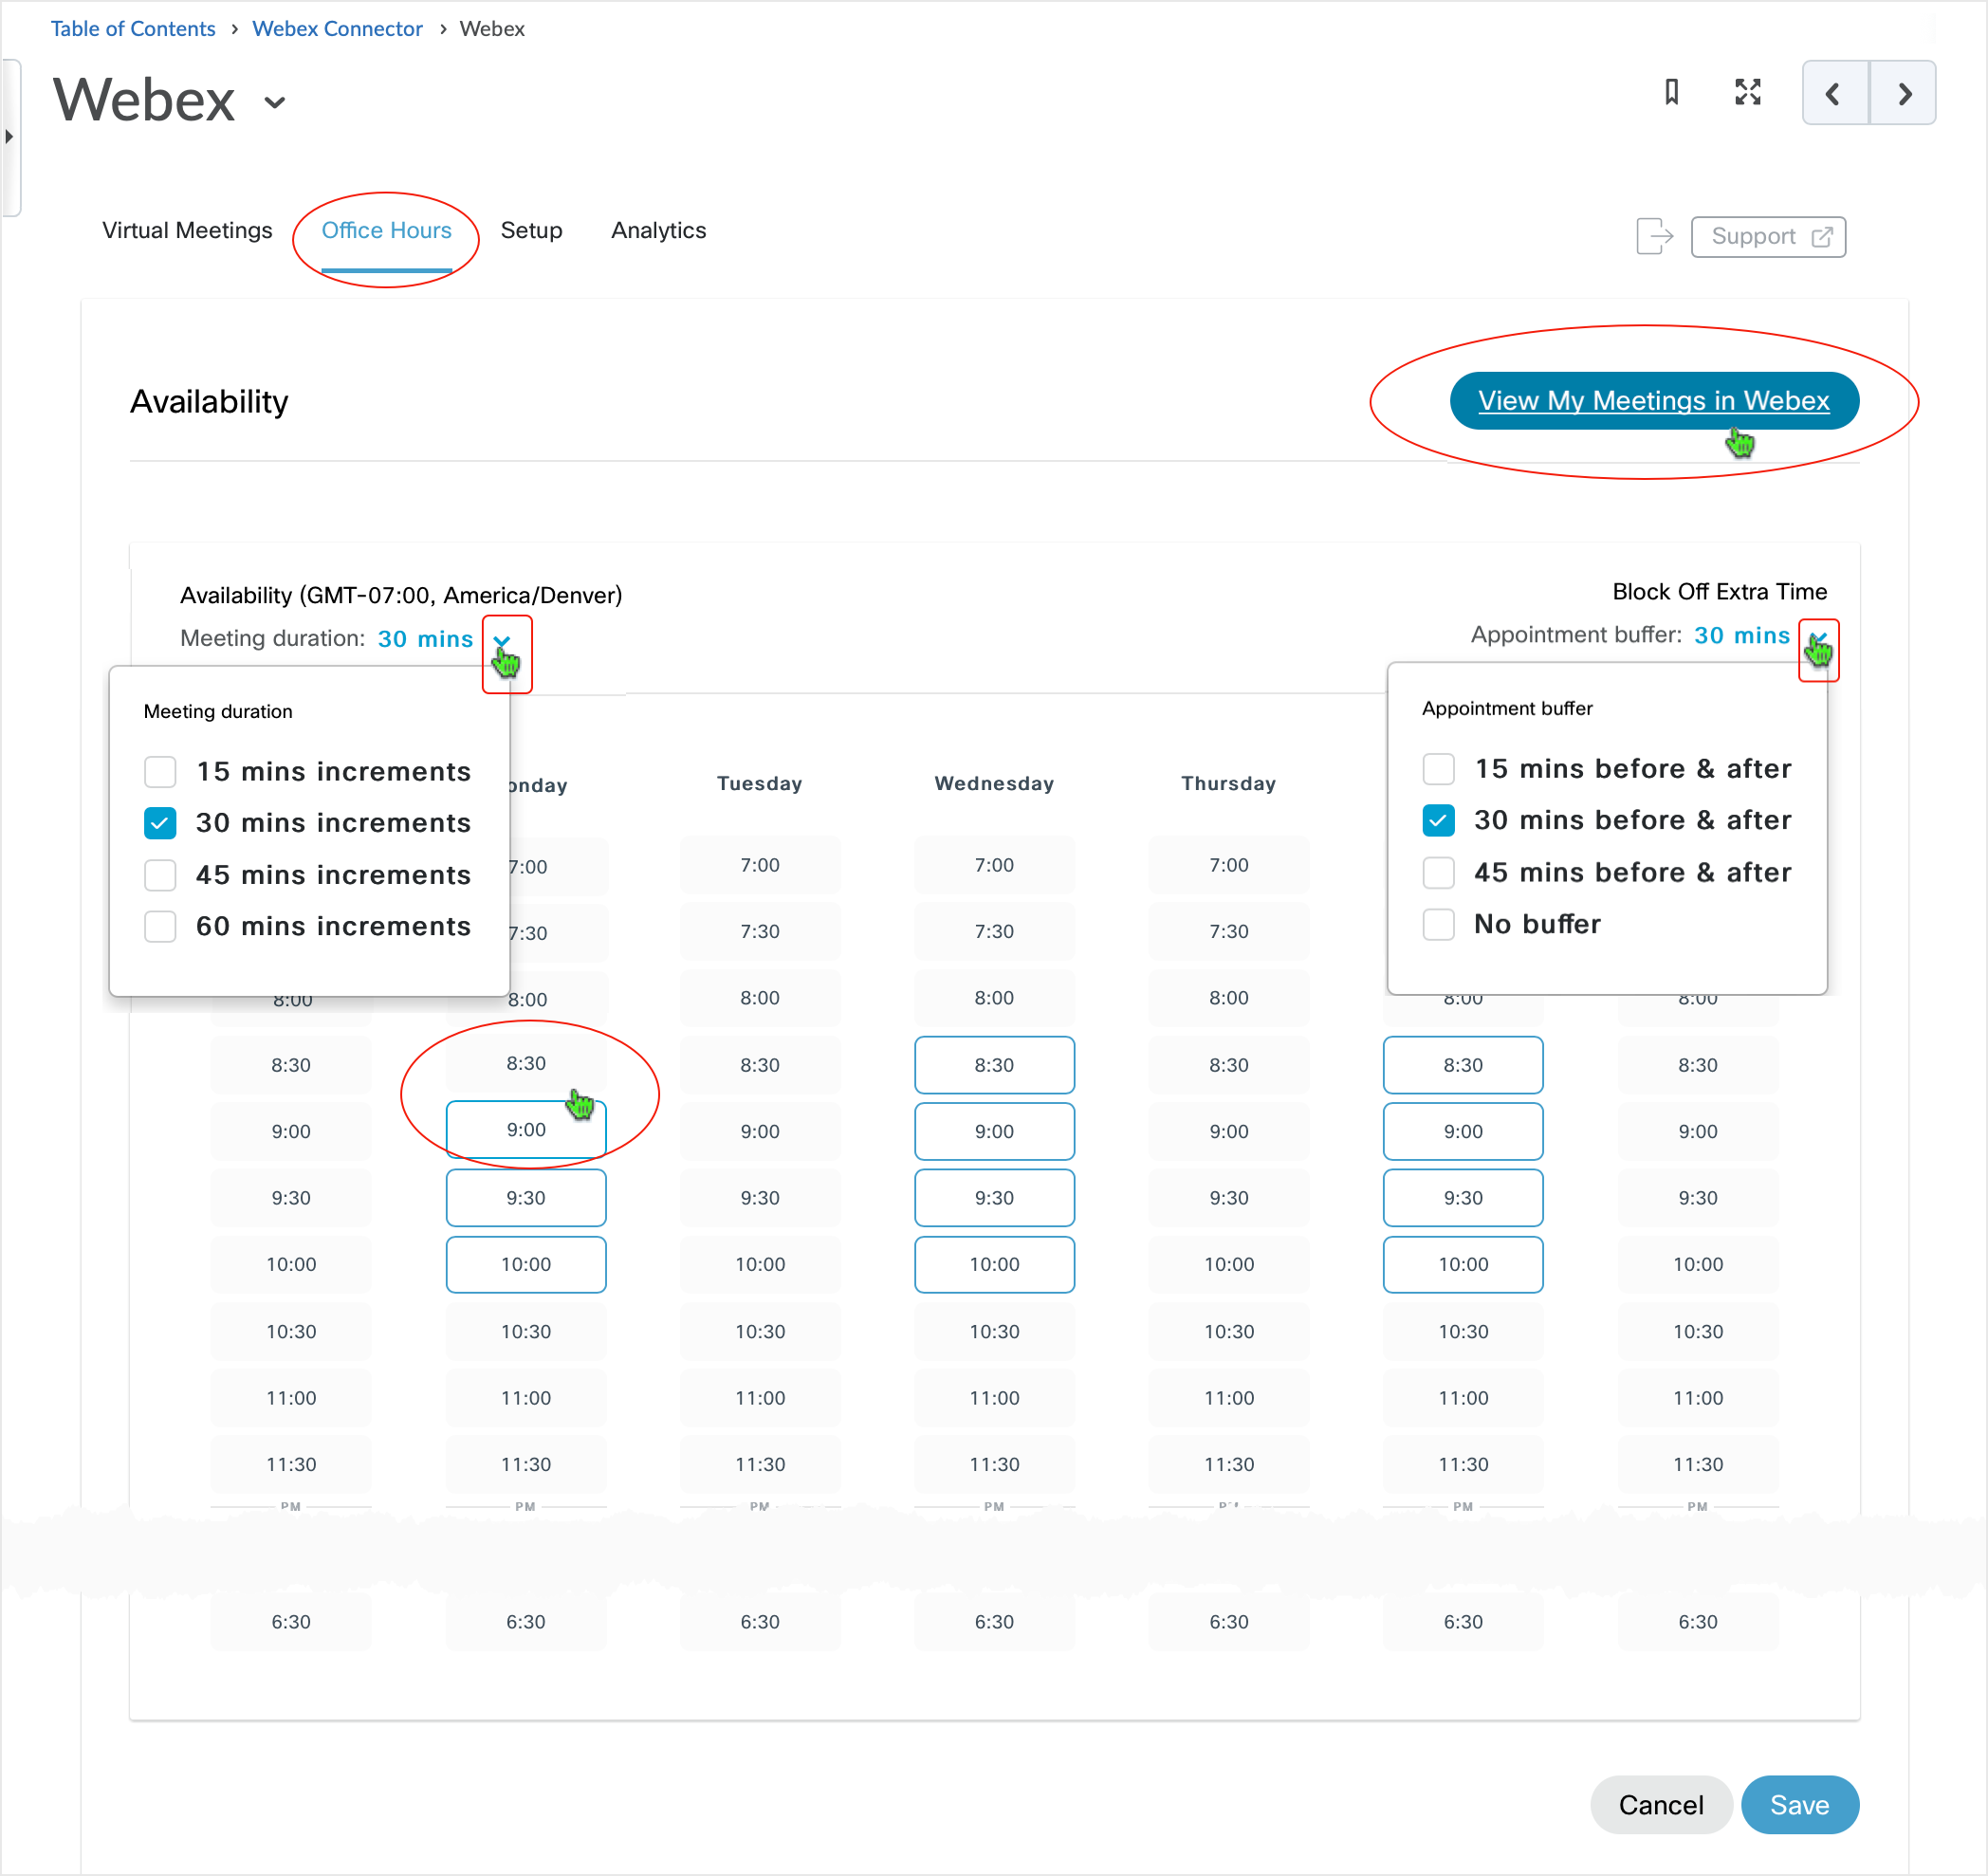
Click the Webex link in your content area and select the “Office Hours” tab.
- Under “Availability” select the “Meeting duration” drop down menu to choose a scheduling increment (15, 30, 45 or 60 minute increments).
- Under “Block Off Extra Time” select the “Appointment buffer” drop down menu and select
the appropriate amount of time.
- An appointment buffer is there in case meetings run over or you need breaks between meetings.
- Select the timeslots under each day of the week that you want to host office hours.
- The selected blocks of time will be highlighted.
- Select the "View My Meetings in Webex" button to access the related Webex account to see information related to meetings that have been scheduled.
Links will open in a new tab or window dependent on browser/OS configuration.
What dialog boxes look like and how dialog boxes and browsers interact is dependent upon the operating system and browser being used. The screenshots in this tutorial may differ from the screen that the user is viewing when performing actions described.
CD 202011