
Video Note
Video Note enables users to create video in the Brightspace system.
Users can elect to insert video recordings (or previously created video) via the HTML Editor's "Insert Stuff" option, or access Video Note recording options in other areas of the system as well. For instance, attachment areas support video (and audio) capabilities.
Video length is limited to 30 minutes.
Accessing Video Note via the HTML Editor
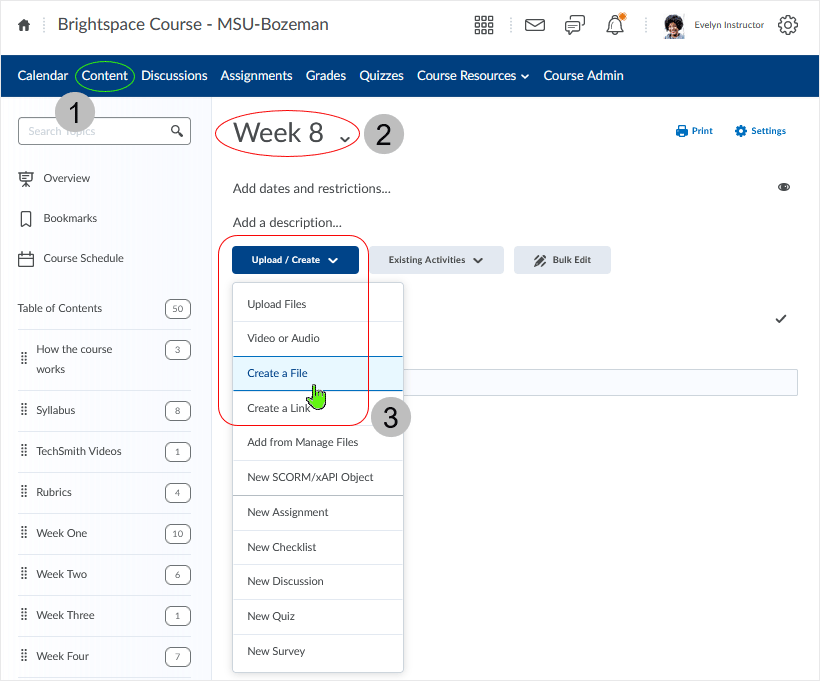
Access the HTML Editor - for instance, an instructor can use "Create a File" when in the Content area. Below is an illustration of a "Week 8" module with a new file about to be created.
- in the Content area of the course
- in the Week 8 module of the Content area
- select "Create a File" from the contextual drop menu visible after selecting Upload/Create button
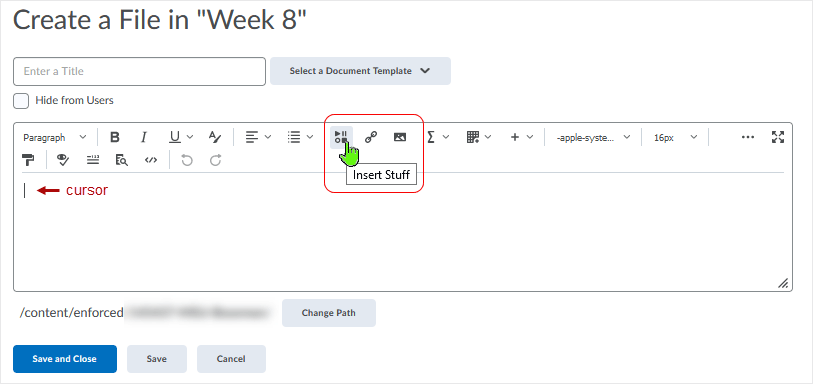
After the HTML Editor is available, place the cursor where the video is to be located and select the "Insert Stuff" icon.
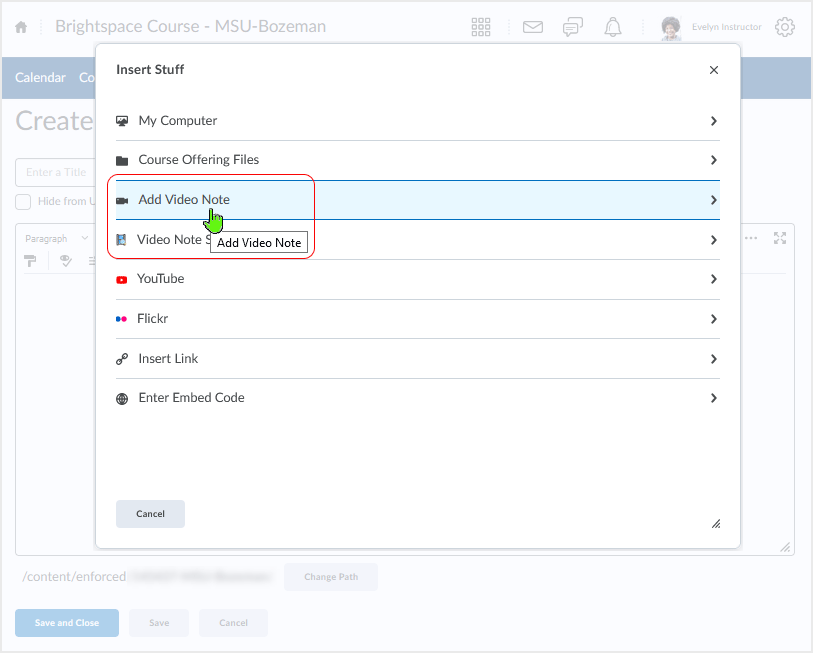
Select "Add Video Note" from the "Insert Stuff" pop-up dialogue box.
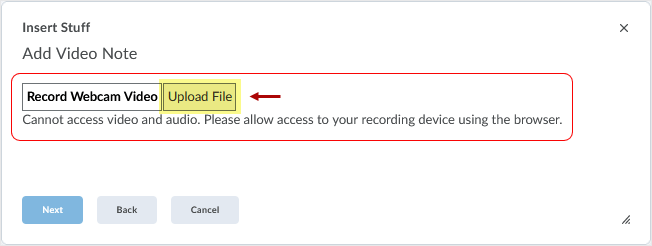
Dependent on operating system and browser choice, Video Note will attempt to connect with a camera via the browser. If no camera is detected, users may see a warning similar to that displayed below.
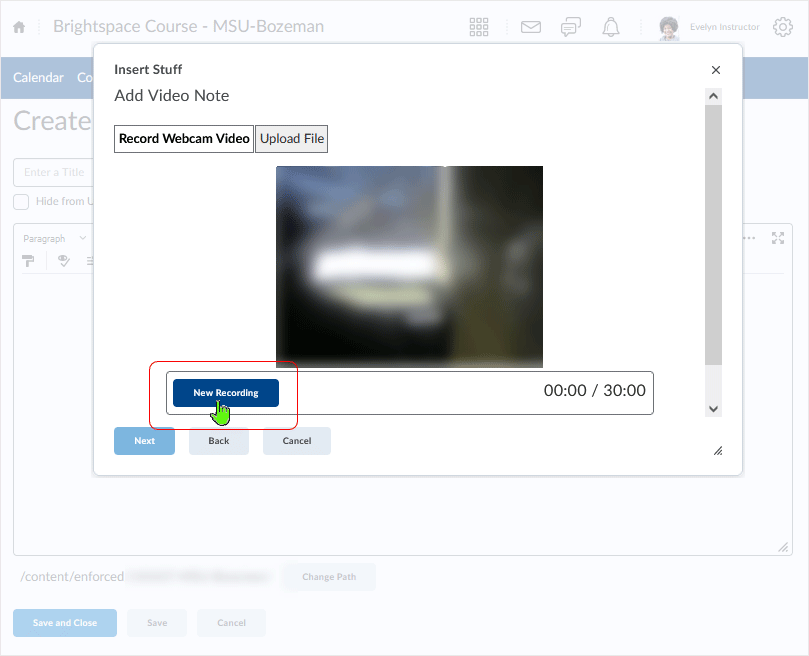
Also, users may choose to "Upload File" in lieu of using a recording method.
Note that users can step back through the process in these areas by selecting the "Back" button.
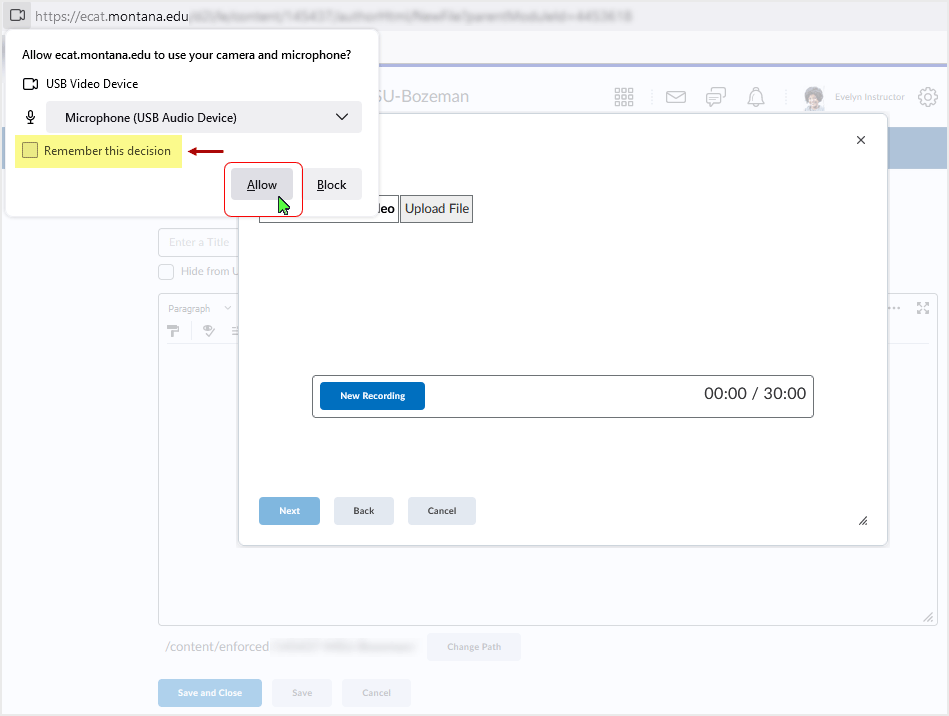
Dependent upon browser and operating system, the system may query the user regarding browser media settings as below. Select "Allow" to make the connection. Note that the decision can be remembered by selecting the "Remember this decision" checkbox.
After the recording image appears, select the "New Recording" button and recording of the video will commence. Up to 30 minutes of recording time is available.
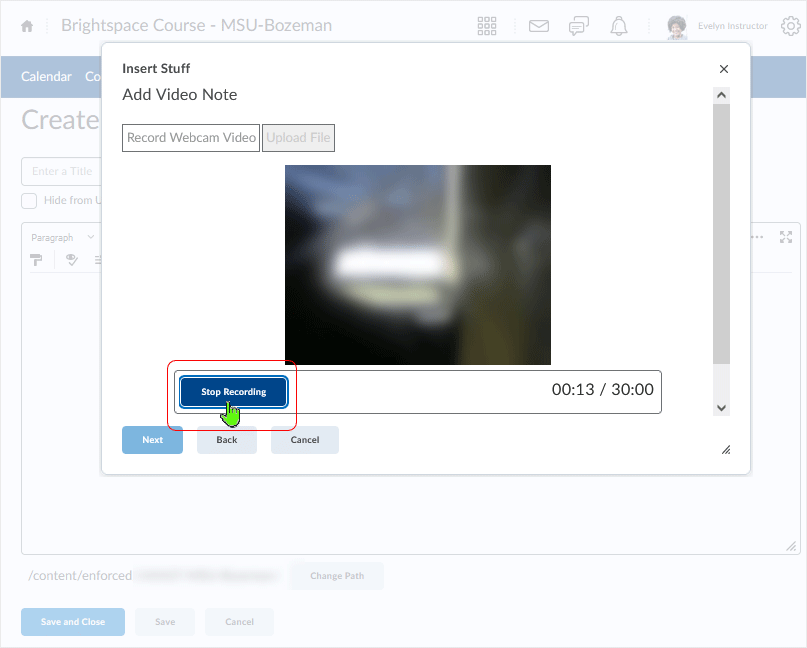
To stop the recording select the "Stop Recording" button.
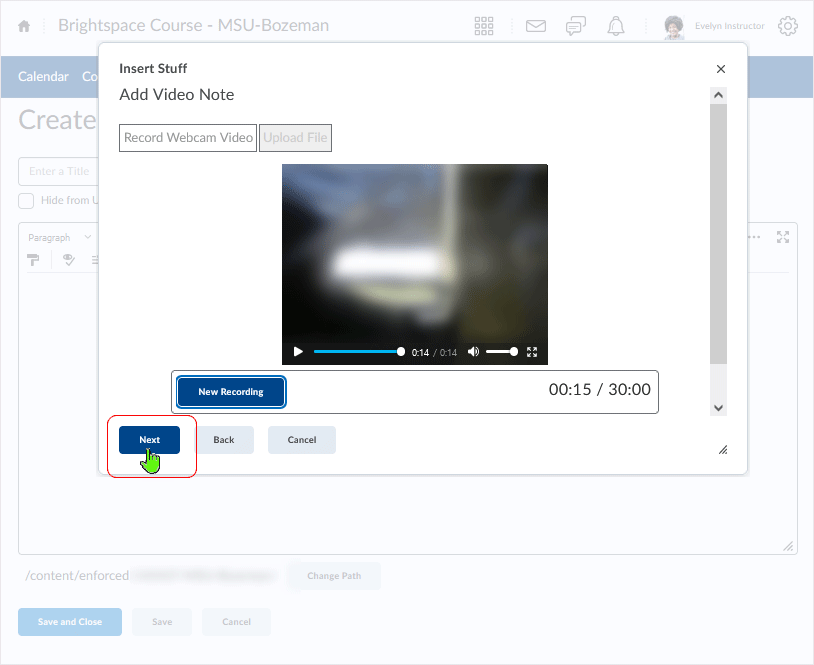
After a recording is stopped, select the "Next" button.
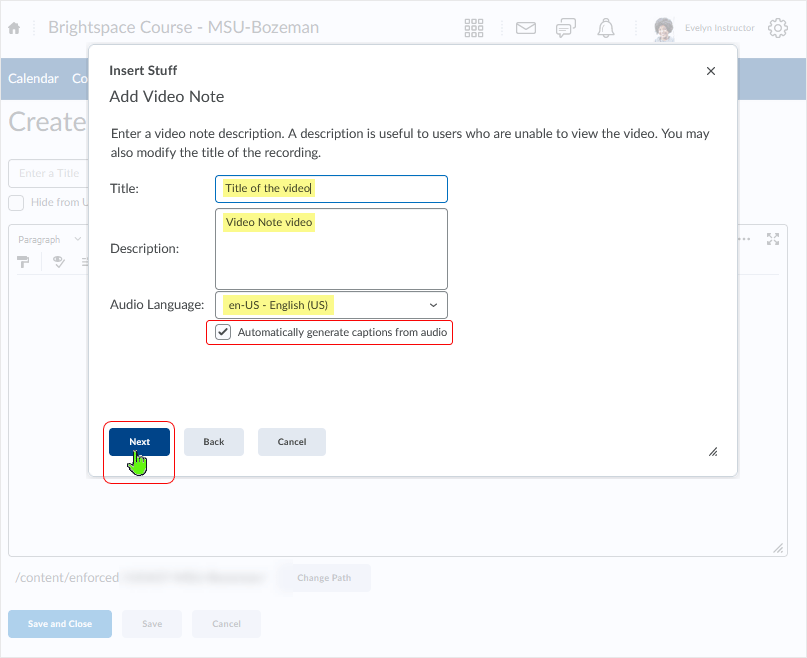
Give the video a "Title:" and a "Description:" as necessary.
The "Audio Language:" drop menu allows choice of the close-captions language to be used for the captions. Select the "Automatically generate captions from audio" checkbox to automatically close-caption the video.
Select "Next" (lower left) to move ahead in the process.
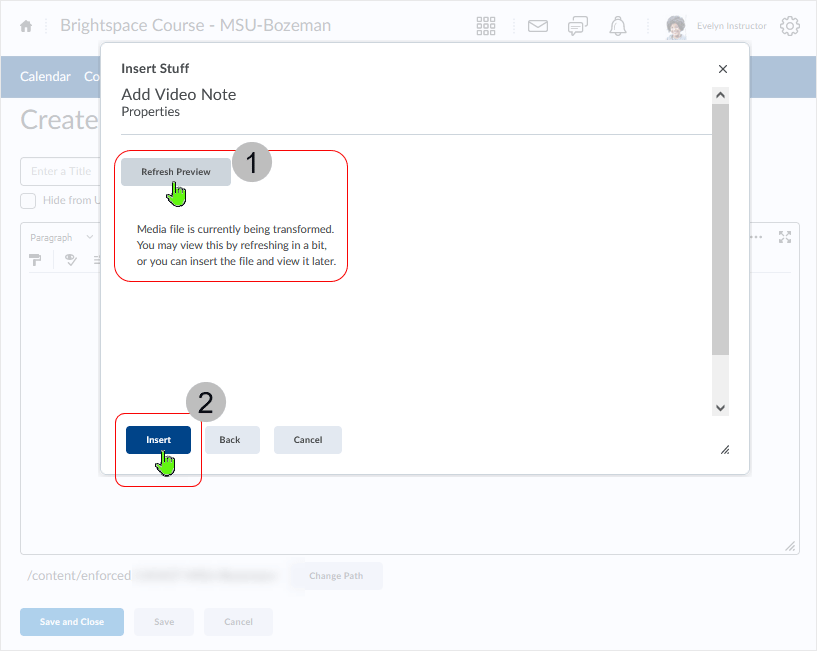
The "Properties" dialogue box displays.
- Select "Refresh Preview" if user wishes to preview the video. The video will take some time to process.
- Select "Insert" button to insert the video into the HTML file where the cursor is located.
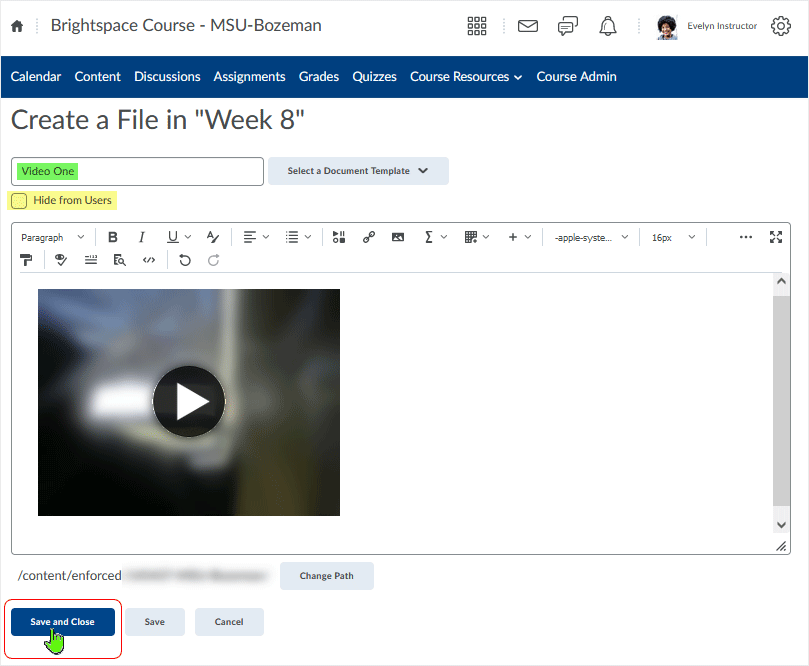
After the video is inserted into the HTML file, the title of the file is visible (green) and the "Hide from Users" checkbox is available to be selected.
Select "Save and Close" to make the video available to users.
Alternately, select "Save" to remain on the page for continued work or "Cancel" to cancel the work performed.
The video will be accessible via the HTML document located inside the Content module and will play inside of Brightspace.
Video Attachments
The ability to create Video (and Audio) attachments can be accessed via different areas of the interface.
For instance, users creating a new thread in the discussions area are presented with an option to record a video or audio.
- Select the caret next to "Add Attachments"
- Select "Record" to access video or audio recording functions

After selecting the "Record Video" button, steps to record a video are similar to those described previously.
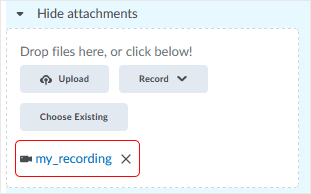
The recorded attachment displays as a link in the attachments area.
Note: The "Title" entered during the video description process is the link text. If no title is added, a series of numbers will display as the link.
Note: The HTML Editor is accessible throughout the Learning Environment so it is possible to use "Insert Stuff" to record and post videos anywhere there is an opportunity to use the HTML Editor in Brightspace. Both faculty and student participants have this ability.
NOTE: What dialogue box windows look like and how dialogue box windows and browsers interact is dependent upon the operating system and browser being used. The screenshots in this tutorial may differ from the screen that the user is viewing when performing the actions described in this tutorial.
CD 202109