
Nickname Your Canvas Course

Now that we’ve transitioned from D2L to Canvas, many instructors are finding that their course names look very similar—especially when viewed in dropdown menus like the Inbox, during course imports, or when selecting a course for copying content. These lists often show only the official course name, which can make it difficult to quickly tell sections apart.
Canvas allows you to assign nicknames to your courses, which are visible only to you. Adding a nickname makes it much easier to identify the right course when navigating menus or managing multiple sections. This quick tutorial will walk you through how to set a nickname so you can keep things organized and reduce confusion as you move through Canvas.
How to Add or Change a Course Nickname in Canvas
-
Go to your Dashboard in Canvas.
Make sure you're in Card View (not List View) so you can see your course tiles. -
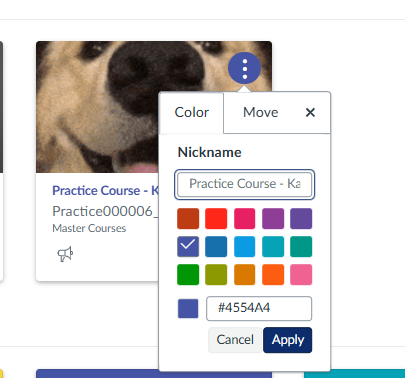
Find the course you want to rename and click the three dots (⋮) in the upper-right corner of that course card.
-
In the pop-up window, type your preferred nickname in the “Nickname” field.
(For example: “ENG 101 – Fall 2025” or “Stats Lab – Section 3”) -
Click Apply.
That’s it! The nickname will now appear on your Dashboard and in various menus—like the Inbox, course import tool, and other dropdown lists—making it easier for you to quickly identify the course. Students will still see the official course name.
You can update or remove the nickname at any time by repeating these steps.