
Avalanche Safety: What to Know Before You Go
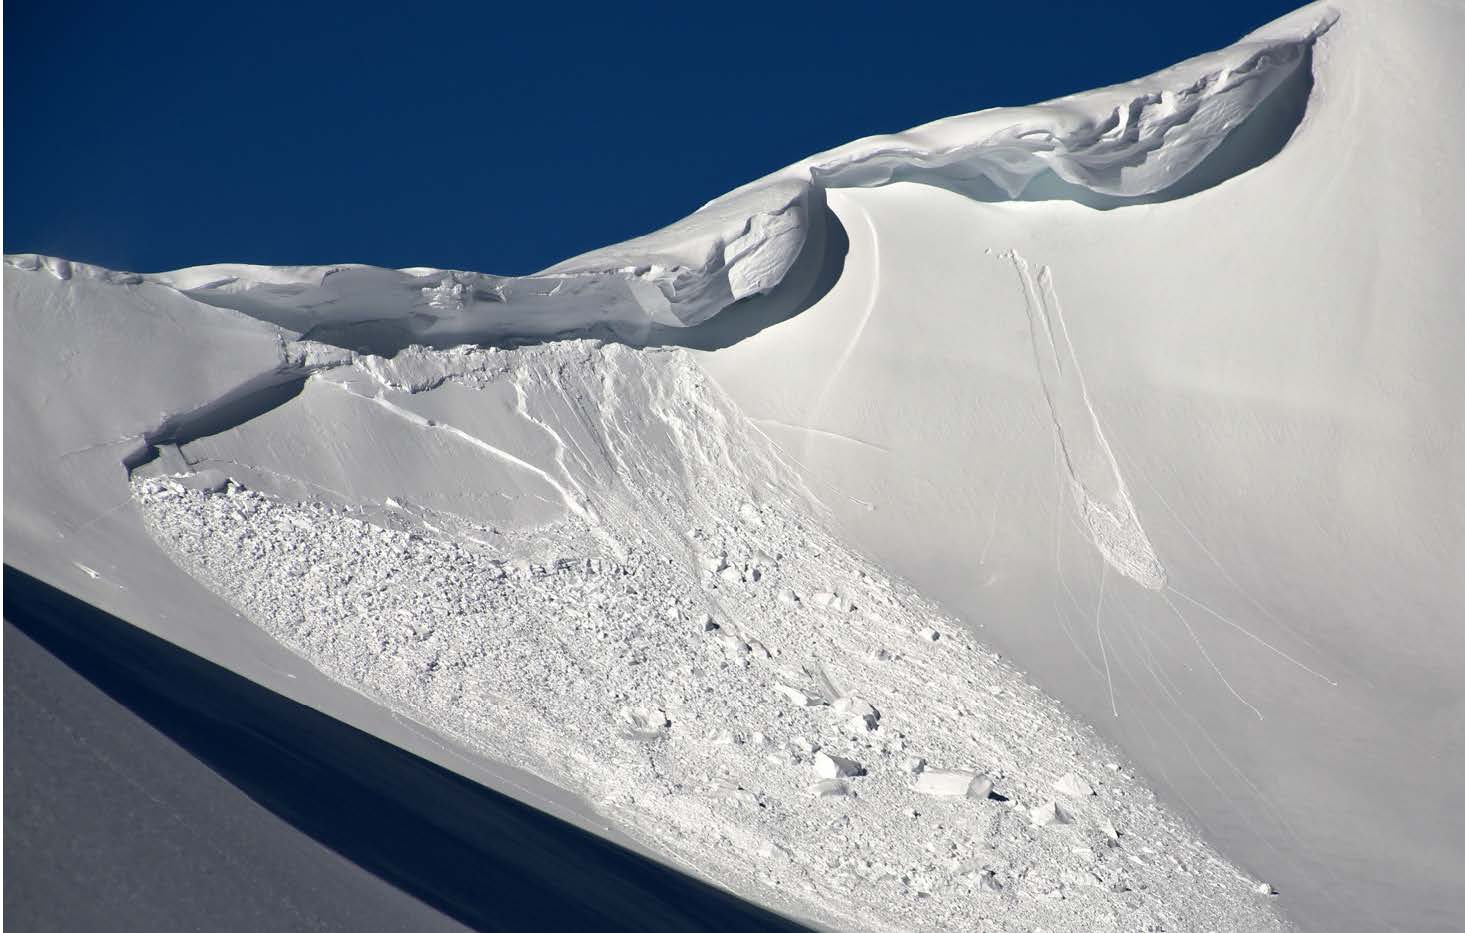
Photo: Flathead Avalanche Center
In the US, avalanches kill 25–30 people annually and injure many more. By becoming avalanche aware, you can reduce your risk of injury or worse.
An avalanche is the rapid flow of snow down a steep slope. Unlike many natural disasters, people can influence their exposure to avalanche hazards. In 90 percent of avalanche incidents, a slide is triggered by a victim or someone in their party.
The message for avalanche safety is simple: if you live, play or work in the mountains, there are ways to reduce your risk from avalanches:
- Get the avalanche forecast.
- Get the gear to perform an avalanche rescue.
- Get the training to effectively use the tools, equipment and resources available.
- Get the picture by learning where avalanches happen, best travel practices and how to look for obvious signs indicating avalanche hazard (KBYG Avalanche Awareness, 2024).
GET THE AVALANCHE FORECAST: KNOW HOW TO ACCESS INFORMATION
An avalanche forecast is the starting point for information about avalanche danger, current conditions and avalanche or snowpack observations. Avalanche forecasts are written by teams of professionals: snow scientists, avalanche hazard mitigators and public safety communicators. In Montana, there are three avalanche forecast centers serving thousands of square miles of mountainous terrain. Montana avalanche forecast centers include the Gallatin National Forest Avalanche Center (GNFAC), Flathead Avalanche Center (FAC) and the West Central Montana Avalanche Center (WCMAC).
Find the avalanche forecast nearest to you by going to avalanche.org.
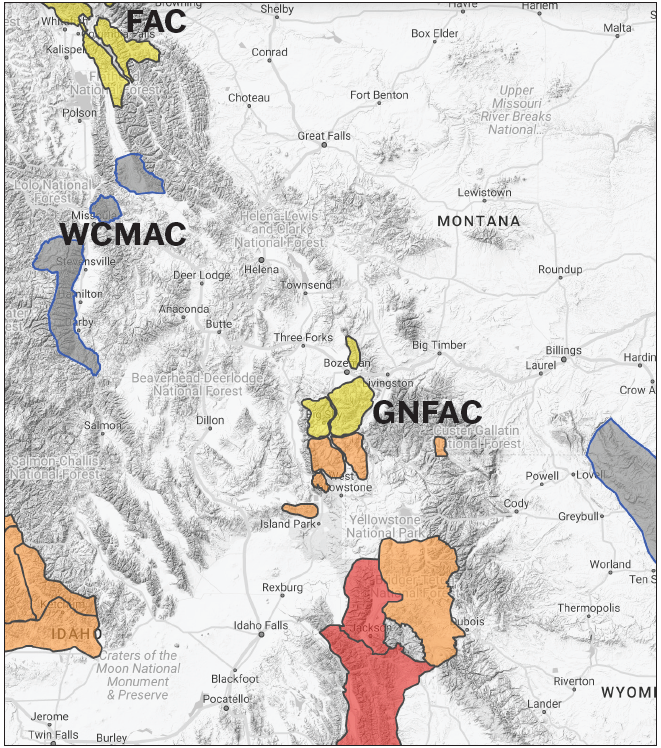
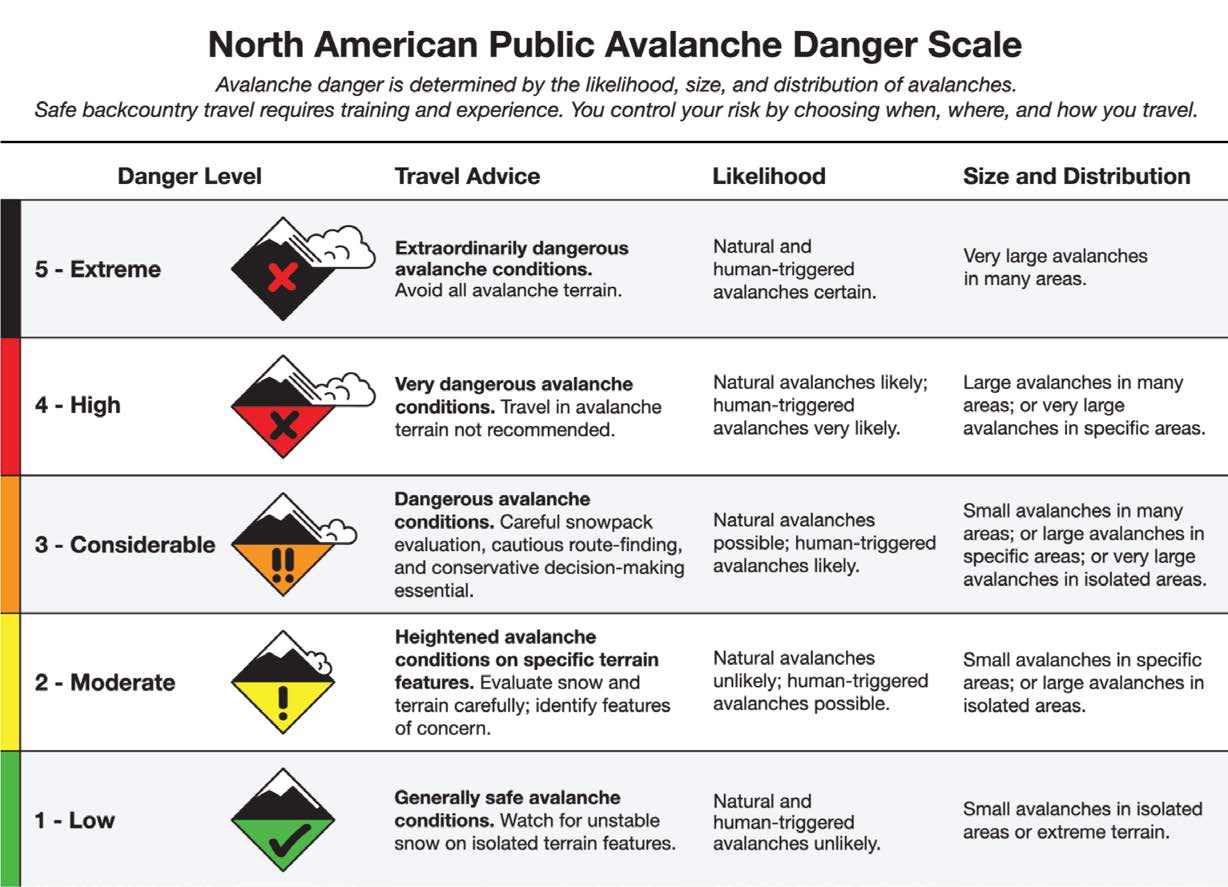
The North American Public Avalanche Danger Scale (NAPADS) is a system that rates avalanche danger and provides general travel advice based on the likelihood, size, and distribution of expected avalanches. The levels in the above chart correspond with the colors on the map.
Photos: Avalanche.org
GET THE GEAR THAT CAN SAVE A LIFE AND GET THE TRAINING TO KNOW HOW TO USE IT
If you are traveling in and around steep slopes where avalanches occur, be prepared
with the right tools for avalanche rescue. At a minimum, this includes the three essential
rescue tools of an avalanche transceiver, probe and shovel. Most avalanche fatalities
are due to asphyxiation (lack of air) or resulting traumatic injuries. The best-case
scenario is a rapid response from trained and prepared partners to reach anyone buried
in snow. The chance of survival in an avalanche drops dramatically after the first
15 minutes of burial (Utah Avalanche Center, 2024).
The list of recommended equipment can seem overwhelming, but more important is having
equipped and trained partners who can save your life in the event of an accident.
The best possible training is field-based and hands-on. You can only learn so much
from articles, videos and the internet.
Access education at avalanche.org, kbyg.org or your local avalanche forecast center’s website.
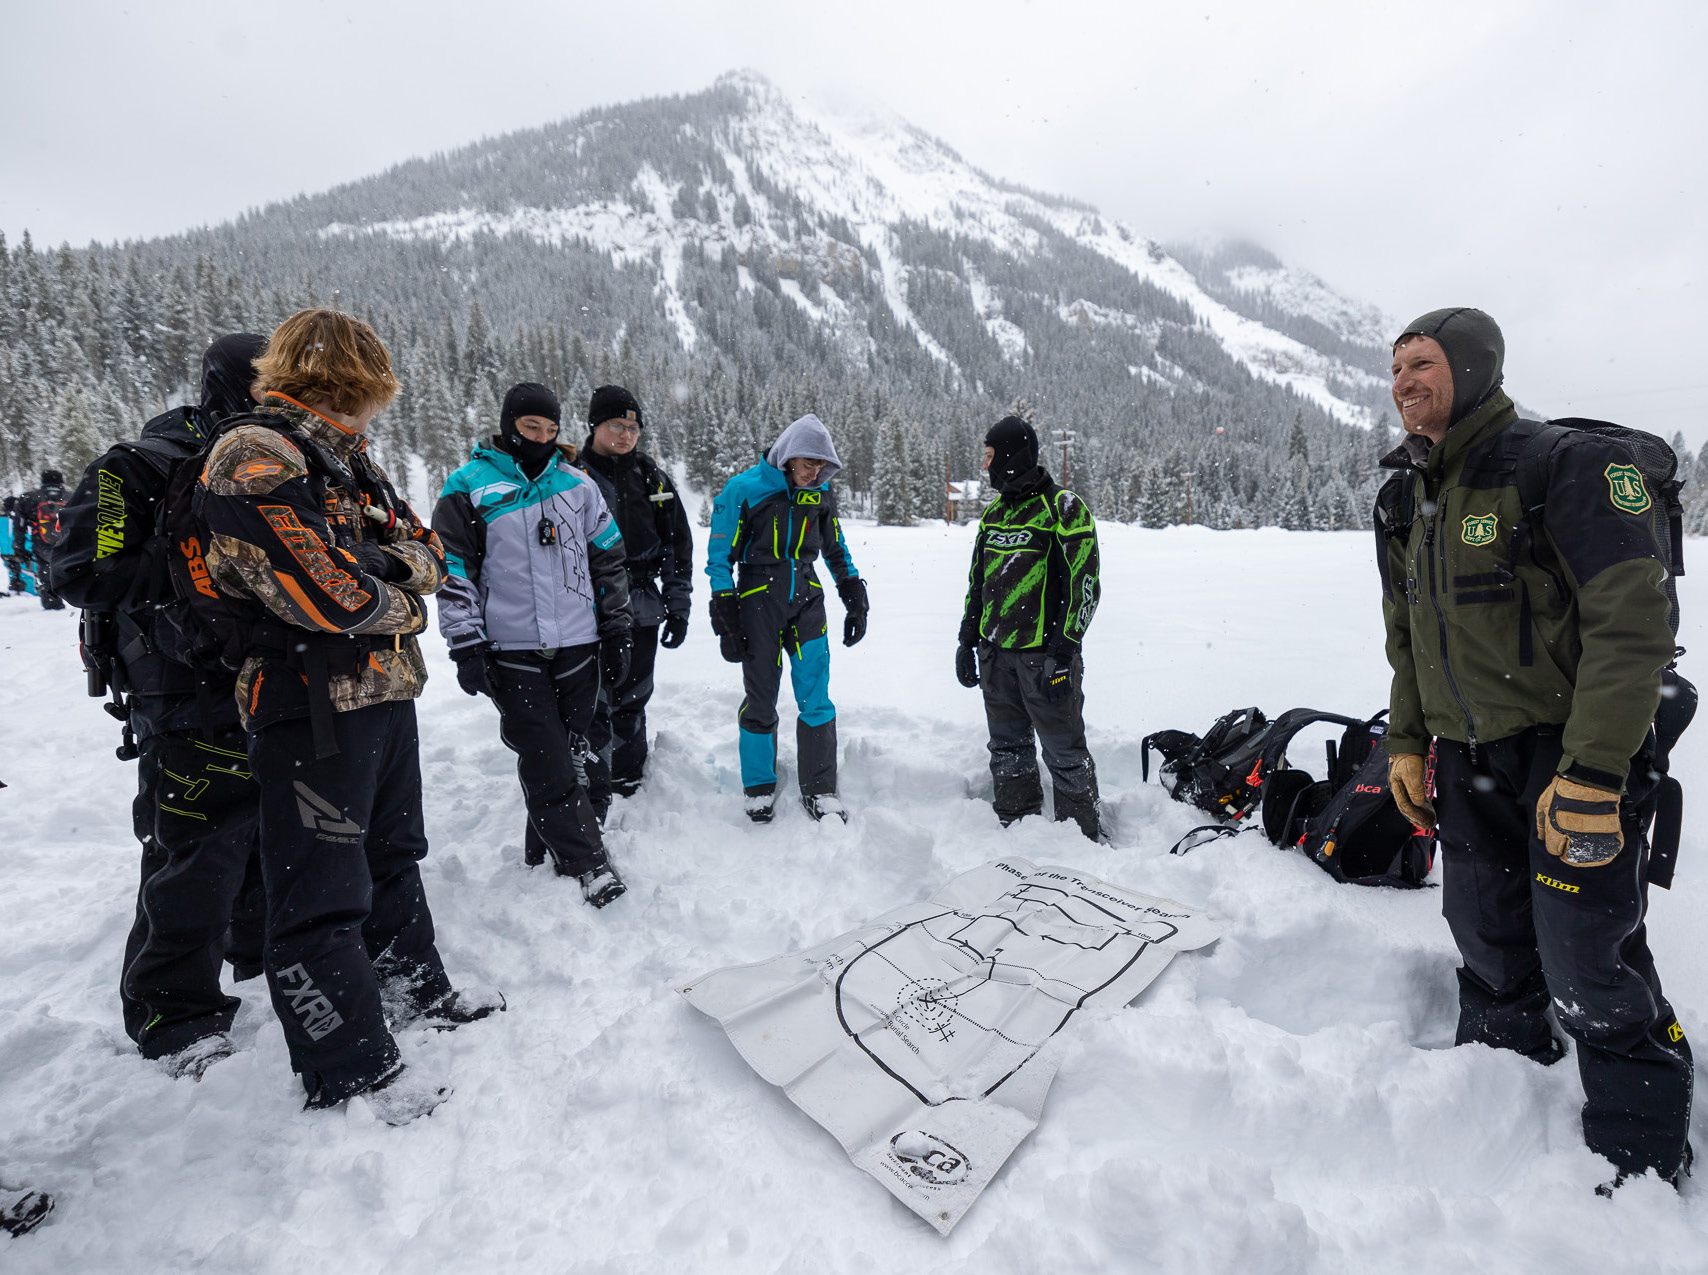
Photo: Meg Simone
GET THE PICTURE: HAVE A SAFE, FUN DAY IN THE MOUNTAINS AND COME HOME TO DO IT AGAIN
To recreate and travel responsibly in the winter backcountry, recognize avalanche terrain (where avalanches start, run and stop), follow safe travel practices (one at a time in avalanche terrain, regroup outside of avalanche terrain) and look for obvious signs of unstable snowpack. Know when you are at risk. Access the information and training to know before you go this winter.
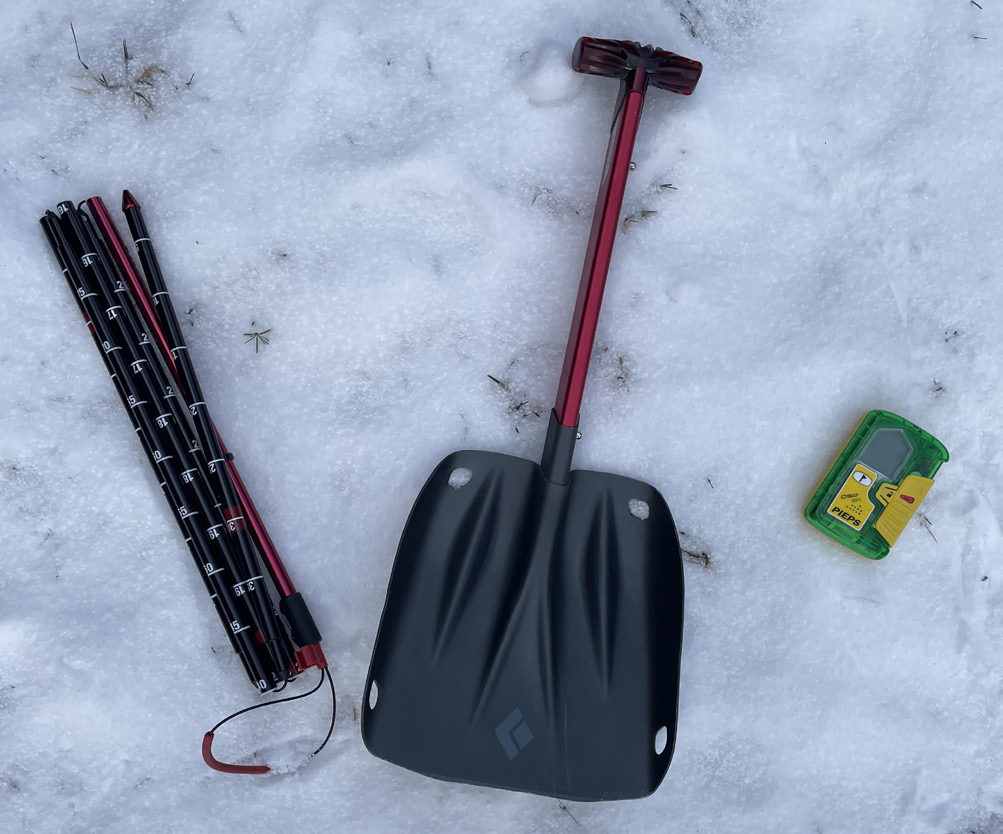
The essential tools for avalanche rescue include a transceiver to locate a buried victim in a wide area, a probe to pinpoint a victim’s location, and a shovel to dig them out.
Photo: Erika Malo, MSU Extension