
Cisco Secure Client for Mac
Follow the instructions below to download, install and connect the Secure Client on your Mac computer (OS X 10.9 or newer) to the new MSU VPN.
Instructions
Download:
- Go to https://www3.montana.edu/software.
Locate the Cisco Secure Client section (see image below). - Click box next to I accept Software Terms of Use.
- Click the Secure Client (5.1) download link in the Mac OS X row (shown in red below).
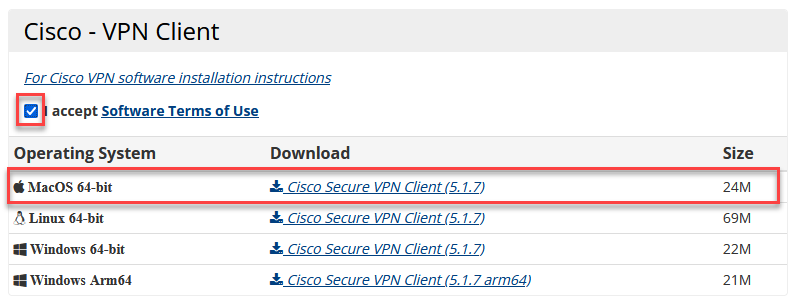
The installer file downloads. When download is complete, follow steps below to install.
Install client:
- Go to your Downloads folder (or whatever location the file was downloaded to) and CTRL-click Secure Client-macos-4.8.00175-core-vpn-webdeploy-k9.dmg and select "Open" from the shortcut menu.
- The Secure Client Secure Mobility Client Installer window should now open (see 2nd
image below).
- Click Continue and follow the steps to install.
- Enter your computer's password when prompted.
- Click Close to shut installer window, after installation is finished.
- Click the Move to Trash button when prompted.
Installation will now be complete.
A notice may appear that you need to make an exception; if this is the case, there should be a window with an "open preferences" button at the bottom. Click this. The Security and Privacy window should open. Click the lock to allow changes. There will be a blurb about "system software from Cisco was blocked from loading". Click on the "allow" button. If this does not solve you issue, contact the UIT Service Desk at 406-994-1777 or via [email protected], or visit www.montana.edu/uit/servicedesk.
Connect to VPN:
- Go to your Applications folder, open the Cisco folder and then click the Cisco Secure Client app.
The Secure Client window opens (see image below). - Enter vpn.msu.montana.edu (if not already entered) and click Connect (see top image below).
In the login window that opens: - Select Group (appropriate for you role at MSU, ie MSU-Employee or MSU-Student).
- Enter NetID and NetID password, click OK.
You will now be connected to the MSU VPN. The Cisco icon in the dock will now have a little padlock on it and a tiny version Cisco round logo with padlock will be displayed on top menu bar.
To disconnect:
Right-click on the icon in top menu bar and select Disconnect.
To connect in the future:
You will no longer go through Network Preferences to connect to the VPN, just use the Secure Client app.
Connect by right-clicking on the Cisco Secure Client icon in the top menu bar or dock,
then click the Connect button in the "VPN Ready to connect" box.
If you don't see the icon in your top menu bar or dock, go to your Applications folder,
open the Cisco folder and click the Secure Client app. Next click the Connect button
as shown in the image under step 4 above.