
Frequently Asked Questions
Find answers to frequently asked questions about Office 365 Email, Outlook, Outlook Web (OWA) and other Office software.
Outlook - Windows
Outlook for Mac
Outlook Web App (OWA)
Email & Calendaring
No. New requests for email aliases will not be fulfilled.
You will need to configure your client using the common email settings listed below.
NOTE: We recommend using Outlook for the best email experience, other solutions are not supported.
Email Address: [email protected] (your email address)
Username: [email protected] ([email protected])
Password: NetID password
Outgoing server (SMTP) setting:
Server name: smtp.office365.com
Port: 587
Security: TLS
Authentication: Normal Password
IMAP setting:
Server name: outlook.office365.com
Port: 993
Encryption method: SSL
POP setting:
Server name: outlook.office365.com
Port: 995
Encryption method: SSL
Please contact the UIT Service Desk at 994-1777 or [email protected].
Yes. Office 365 is available to users anywhere in the world where you have an internet connection.
For the most up to date info on message size limits and attachments please see: https://technet.microsoft.com/en-us/library/exchange-online-limits.aspx?f=255&MSPPError=-2147217396#MessageLimits.
Your department may give you specific guidance or requirements. In addition, all faculty, staff, and students have the option to use https://filesender.internet2.edu.
Messages in your Deleted Items folder will be automatically deleted after 30 days.
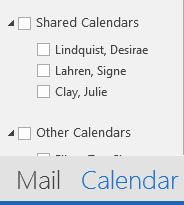
To add a shared calendar:
- Open the Calendar (in Outlook or OWA).
- In the left-side navigation right-click on Shared Calendars and select Add Calendar
from Address Book.
The Address Book opens. - Enter the name of the person who has shared their calendar with you and click the Go button (see image below).
- Highlight the correct name in the list that is displayed, click the Calendar button
on the lower left and then click the OK button.
The calendar will now be visible under Shared Calendars in the left navigation panel.
To remove a shared calendar, right-click on the calendars name under Shared Calendars and select Delete Calendar.
Direct Link Method
Go to the web link: Mail - Change Photo
Via Outlook
- Logon to Outlook.
- Go to file, which should open to Account Information.
- On the silhouette, select the 'change' link. This will take you to the web access.

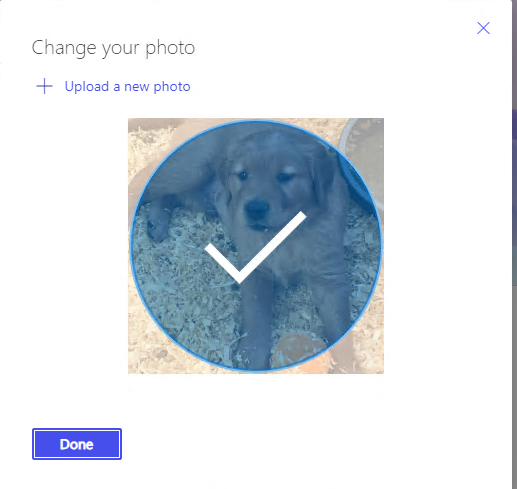
- Then click the circle icon at the top right corner.

- Click this profile circle once more.

- This will open the pop-up to change your profile picture.

- You can select a photo by browsing or dragging a photo to this location. Then save. It may take a few minutes for your photo to change in the profile as it must fully sync.
Scheduling Poll is a native feature for Office 365 Outlook on the web and for Outlook 20121 that allows you to create meeting polls allowing attendees to choose (vote for) the times that work best for them.
Outlook - Windows
Follow the appropriate instructions below:
To change junk email settings:
- Click the Home tab.
- Select down arrow on Junk icon and select Junk E-mail Options.
- Click appropriate tab to make changes.
Tabs:
Options - change the level of aggressiveness for how Outlook filters junk mail
Safe Senders - add addresses to list of senders that should not be treated as junk.
Blocked Senders - add addresses to list that should ALWAYS be treated as junk.
To block senders:
Block a sender or send a message to junk folder directly from your inbox by right-clicking a message and selecting Block sender OR Junk > Send to Junk Folder.
These instructions may also be viewed in the Microsoft Office Support pages Block or allow junk email settings article.
Visit Focused Inbox for Outlook to learn more.
No, you can turn it off following these instructions:
Outlook for Mac
Follow this link to instructions:
Outlook lets you mark email as junk or block a sender from
Mark email as junk:
- Right-click the unwanted email, and select Junk Mail > Mark as Junk.
- Or, select the unwanted email, and then select Home > Junk > Junk.
Both options will move the email to your Junk Email folder
Move emails that are not junk to the Inbox
- Select the Junk E-mail folder, select an email, and then select Home > Junk > Not Junk.
- Or, to move email from Junk folder to inbox- select the Junk E-mail folder, right-click the email, and select Junk Mail > Mark as Not Junk.
The email message is moved to the Inbox.
Block a sender
- Select the unwanted email.
- Go to Home tab.
- Click Junk dropdown arrow > Block Sender.
OR right-click message and click Junk Mail > Block Sender.
Go to Focused Inbox for New Outlook for Mac to learn more.
No, you can turn it off following these instructions:
or Go to theOrganize tab, click theFocused Inbox icon. This will deselect it and the Focused andOther tabs will disappear from the top of your mailbox.
Outlook Web App (OWA)
Log into Office 365 OWA by going to http://outlookweb.montana.edu and clicking the Log In button.
Log in credentials:
User name:
- Faculty/Staff?student Workers: [email protected]
- Students: [email protected]
Password: NetID password
OWA will timeout after 8 hours of inactivity.
Visit Block or allow (junk email settings) to learn how to use these settings to manage junk email and about creating safe senders and blocked senders lists.
Office 365 ProPlus Software
Visit Office 365 ProPlus for Faculty and Staff where you'll find downlaod and
Check out Microsoft's Office accessibility video training series, to learn how to create accessible content in Outlook, Word, Excel and PowerPoint.
See also accessible Office templates for download.
Please contact the IT Service Desk at 994-1777 or [email protected].
Please contact the IT Service Desk at 994-1777 or [email protected].
It is possible, but not recommended, as you could accidentally sync this sensitive data to the cloud and/or desktop. You should never use OneDrive for Business to sync any data that is restricted or contains student information as this will create a copy of the data on your local hard drive. If ever in doubt contact the IT Service Desk at 994-1777 or [email protected].