
Set up Student Email on Outlook
Outlook Desktop Instructions
Use the instructions below to set up your MSU Office 365 student email account on Outlook or Outlook for Mac desktop/laptop version.
- Open Outlook for Mac.
- Click Preferences link (command ,) located under Outlook menu.
- Click Accounts.
- Select Exchange or Office365
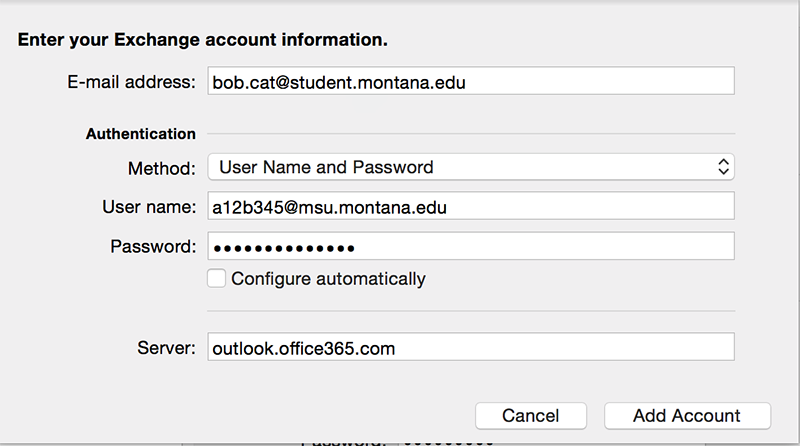
OR if you have already have an email account in Outlook, click the dropdown arrow located next to the plus (+) sign in the bottom left of panel and select Exchange. See image below for steps 5-8. - Enter settings as shown below:
- Email address: [email protected]
User name: [email protected] (for example, [email protected])
Password: NetID Password - Check the box next to Configure automatically.
- Click the Add Account button.

When prompted ...do you want to allow this server to configure your settings: - Check the box next to Always use my response for this server then click the Allow button.
Your account should now be configured.
NOTE: If for some reason your account is unable to be configured automatically, enter information in step 6 as instructed above but uncheck the automatically configure check box. You will be prompted for server address, follow steps below:
- Enter outlook.office365.com in the Server field. See image below.
- Click the Add Account button
When prompted with ...do you want to allow this server to configure settings: - Check the box next to Always use my response for this server then click the Allow button.
Your account should now be configured.
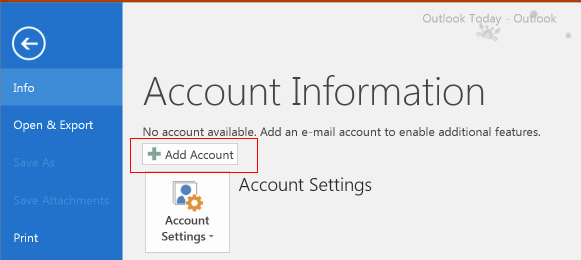
- Open Outlook.
- Click the File menu tab.
- Click Add Account.
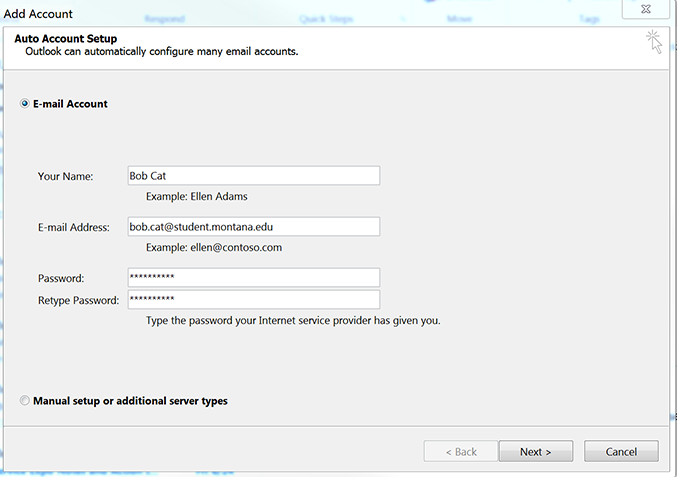
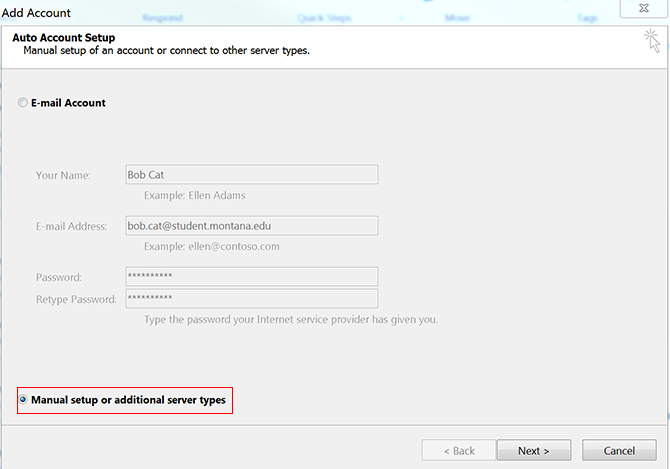
- Enter fields as shown below:
Your Name: Bob Cat
Email address: [email protected]
User name: [email protected] (for example, [email protected])
Password: NetID Password
Make sure the radio button next to Manual setup... is NOT selected. - Click the Next button.
The Windows Security panel opens prompting for your password. - Replace the auto populated User name with:
User name: [email protected]
Password: NetID password
Then click the OK button.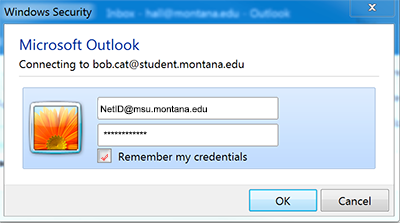
Your account should now be set up.
To manually set up account:
- Click the radio button next to Manually setup... and then click the Next button.
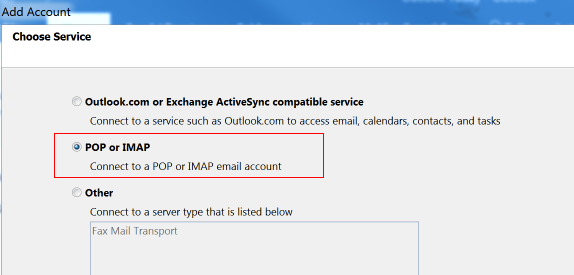
- Click radio button next to POP and IMAP and then click the Next button.
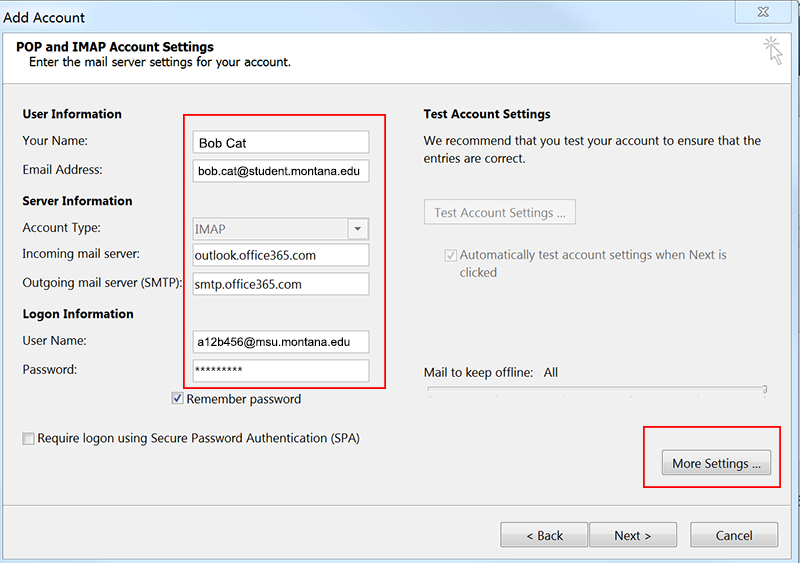
- Enter fields as shown below:
Your Name: Bob Cat
Email address: [email protected]
Account type: IMAP
Incoming Mail server: outlook.office365.com
Outgoing SMTP server: smtp.office365.com
User Name: [email protected] (example: [email protected])
Password: NetID password - Click the More Settings button.
The Internet E-mail Settings panel opens. - Click the Outgoing Server tab.
- Check the box next to My outgoing server (SMTP) requires authentication and the radio button next to Use the same settings... as shown in image below.
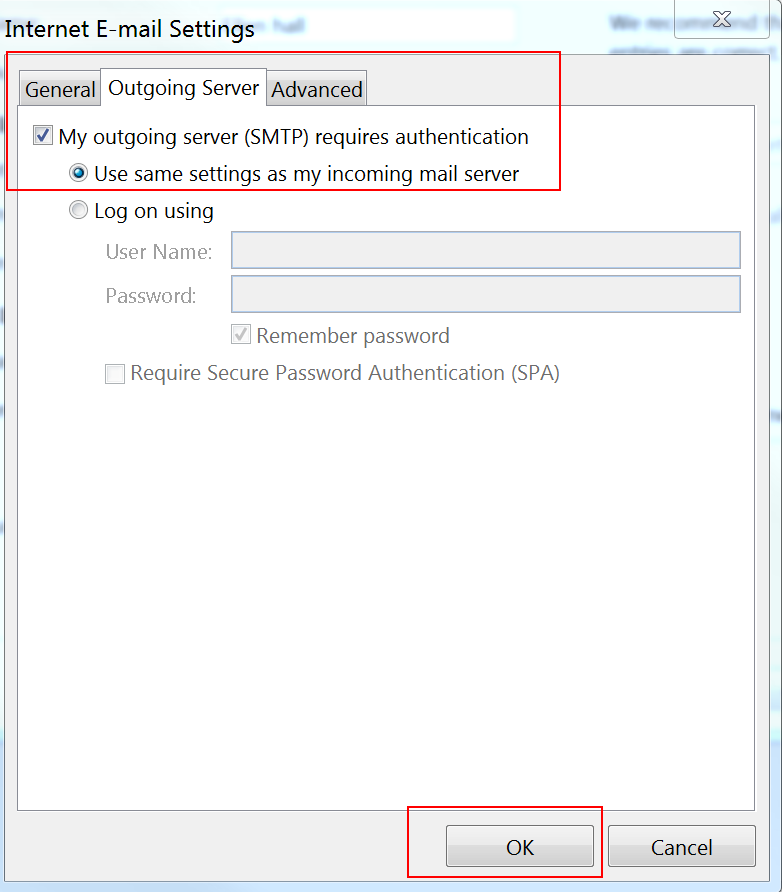
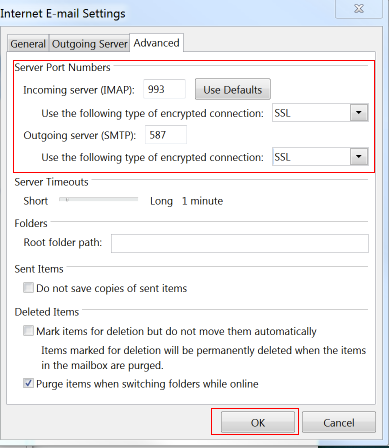
- Click the Advanced tab.
- Enter the following under Server Port Numbers:
Incoming server (IMAP): 993
Use the following type of encryptied connection: SSL
Outgoing server (SMTP): 587
Use the following type of encrypted connection: Auto - Click the OK button.
- Test Account Settings should start automatically. If it doesn't, click the Test Account Settings button to verify info entered.
- Click the Close button, then click Finish.
If the test fails and account can not be set up, contact the UIT Service Desk for assistance.